I really, really am enjoying the two big, substantial
projects I am working on (or one big project and fairly large scarf). However,
other concerns have drawn me away from them this week.
First, one of the kids who used to ride on the band bus with
me and is now a college student posted on one of my Facebook links that he
really wished he had some of those handle covers for cast iron skillets, since
no one in his family knew how to make them anymore. I figured that would be an
easy project, so I found what looked to be a sturdy pattern on Ravelry, and off
I went.
 |
| Handle cover, and bonus picture of my place mat |
I made the small above one first, then a larger one, using Sugar-n-Cream in the requested colors. The
first one fit my smaller aluminum skilled handle well, but the big one below would
need to be longer to fit one of my larger skillets. I’d need an even bigger one
for my hugest skillet, but its handle never gets hot. I’d need to find a more
genuine old-fashioned cast-iron skillet to test them out, and of course the kid
has not been on Facebook that I can tell since he asked the question (most
young folks block us old folks, though, so who knows). In any case, now that I
have the basic principles down for making these, I can easily customize them.
 |
| Both handle covers. Classy. |
The idea is to make 4 layers, then attach all four on three
sizes, then attach two around the opening. Then you make a border that’s just
one layer thick, not where your hand would touch. Four layers of worsted weight
cotton are plenty thick to protect your hands!
The funny thing is that my photos of these very, very simple
objects got tons of comments on Facebook, and all sorts of people wanting me to
make them for them or for family members. On the other hand, if I post a photo
of a large and complicated garment, and like three people look. Obviously,
utility wins! I guess I will make a few for folks, even though crocheting still
hurts my hands a lot more than knitting.
I also got another request. Lee’s dad wants leg warmers for
the fall and winter. Long-time readers will recall that I made him some house
socks a couple of years ago. I am sure those did not hold up well to the amount
of wear he gives them and the amount of machine washing they get. So, normal
socks plus leg warmers might be a better idea.
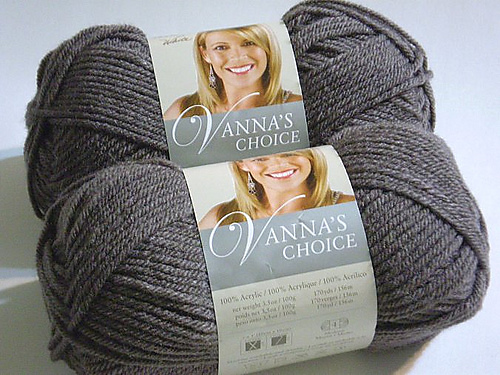
Common sense will dictate the choice of yarn: 100% acrylic,
naturally! I chose what Vanna White would choose, in charcoal gray.
 |
| Hello, Vanna. |
I went
looking for a pattern and found a very sweetly written one on a blog called
Civic Stitchings.
It is her first pattern. She bravely uses her own abbreviations and spelling
rules (kn 2, pearl 2!) but it was sufficient to give me ideas.
I have more than half the first one done, but it’s not very
exciting, so no photo. I ended up modifying the pattern so much that all that
remains of it are a k2 p2 beginning and end and casting on 60 stitches. The
decreases in the original were only 6 rows apart, and evenly spaced. I did
paired decreases every 8 rows to make it slowly get smaller down a skinny old
man calf. They look fine to me. Lee tried it on and it appears to be a fine leg
warmer width to go over a man’s pants. We will see. Hee hee, that’s what Lee’s
dad says all the time.
I will make his golden years or months warm and cozy,
anyhow, and certainly the request of an 89-year-old fellow dealing with
terminal cancer trumps my need for a fussy sweater with fancy yarn.
Oh, and I did finish something else—five more place mats
just like the previous ones came off my loom last week. But, since they look
just like the other ones, only with better selvedges, I will spare you photos--you can see one of them in the picture with the two skillet handle covers.
Now, by gosh, we can have a meal and everyone gets a mat! I am trying to decide
what to make next on the loom. It’s a toss-up between something plaid and
something sparkly.
By the way, I've been getting lots of requests for the mitered square blanket pattern lately! That makes me feel good. It's so much fun to make those.
