Monday, August 13, 2012

Inexpensive Projects in Cheap Yarn


I really, really am enjoying the two big, substantial projects I am working on (or one big project and fairly large scarf). However, other concerns have drawn me away from them this week.

First, one of the kids who used to ride on the band bus with me and is now a college student posted on one of my Facebook links that he really wished he had some of those handle covers for cast iron skillets, since no one in his family knew how to make them anymore. I figured that would be an easy project, so I found what looked to be a sturdy pattern on Ravelry, and off I went.
Handle cover, and bonus picture of my place mat
I made the small above one first, then a larger one, using Sugar-n-Cream in the requested colors. The first one fit my smaller aluminum skilled handle well, but the big one below would need to be longer to fit one of my larger skillets. I’d need an even bigger one for my hugest skillet, but its handle never gets hot. I’d need to find a more genuine old-fashioned cast-iron skillet to test them out, and of course the kid has not been on Facebook that I can tell since he asked the question (most young folks block us old folks, though, so who knows). In any case, now that I have the basic principles down for making these, I can easily customize them.
Both handle covers. Classy.

The idea is to make 4 layers, then attach all four on three sizes, then attach two around the opening. Then you make a border that’s just one layer thick, not where your hand would touch. Four layers of worsted weight cotton are plenty thick to protect your hands!

The funny thing is that my photos of these very, very simple objects got tons of comments on Facebook, and all sorts of people wanting me to make them for them or for family members. On the other hand, if I post a photo of a large and complicated garment, and like three people look. Obviously, utility wins! I guess I will make a few for folks, even though crocheting still hurts my hands a lot more than knitting.

I also got another request. Lee’s dad wants leg warmers for the fall and winter. Long-time readers will recall that I made him some house socks a couple of years ago. I am sure those did not hold up well to the amount of wear he gives them and the amount of machine washing they get. So, normal socks plus leg warmers might be a better idea.

Common sense will dictate the choice of yarn: 100% acrylic, naturally! I chose what Vanna White would choose, in charcoal gray. 
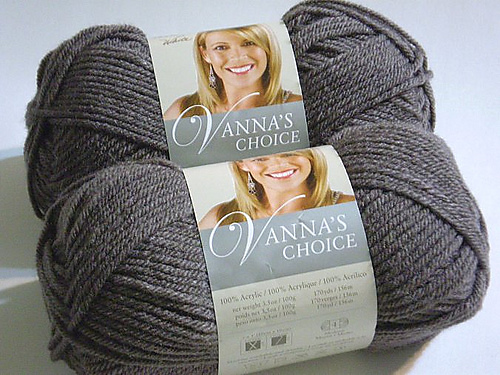
Hello, Vanna.
I went looking for a pattern and found a very sweetly written one on a blog called Civic Stitchings. It is her first pattern. She bravely uses her own abbreviations and spelling rules (kn 2, pearl 2!) but it was sufficient to give me ideas.

I have more than half the first one done, but it’s not very exciting, so no photo. I ended up modifying the pattern so much that all that remains of it are a k2 p2 beginning and end and casting on 60 stitches. The decreases in the original were only 6 rows apart, and evenly spaced. I did paired decreases every 8 rows to make it slowly get smaller down a skinny old man calf. They look fine to me. Lee tried it on and it appears to be a fine leg warmer width to go over a man’s pants. We will see. Hee hee, that’s what Lee’s dad says all the time.

I will make his golden years or months warm and cozy, anyhow, and certainly the request of an 89-year-old fellow dealing with terminal cancer trumps my need for a fussy sweater with fancy yarn.

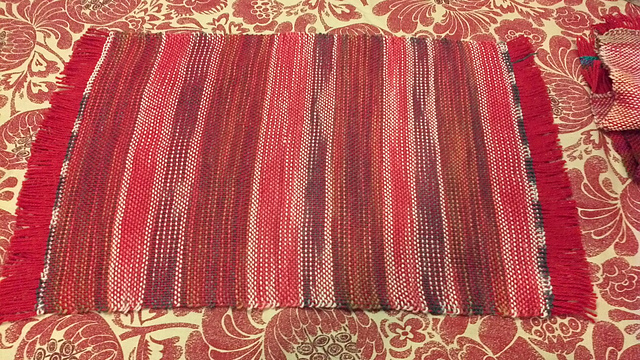
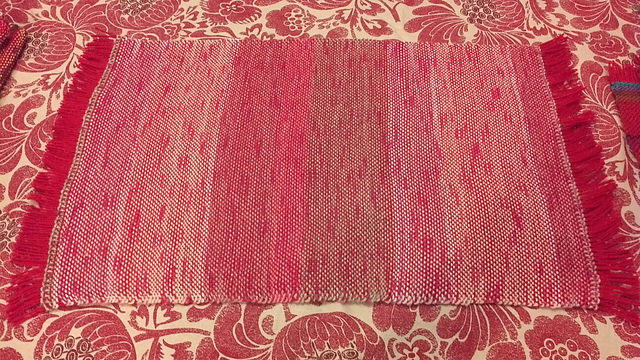
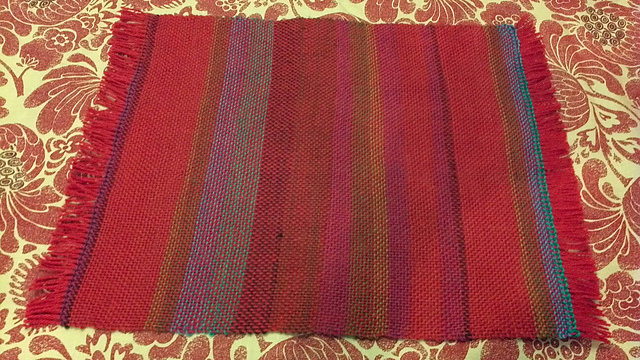
Oh, and I did finish something else—five more place mats just like the previous ones came off my loom last week. But, since they look just like the other ones, only with better selvedges, I will spare you photos--you can see one of them in the picture with the two skillet handle covers. Now, by gosh, we can have a meal and everyone gets a mat! I am trying to decide what to make next on the loom. It’s a toss-up between something plaid and something sparkly.

By the way, I've been getting lots of requests for the mitered square blanket pattern lately! That makes me feel good. It's so much fun to make those.

Wednesday, August 1, 2012

Oh Yes, about That Sawtooth Edging Pattern

Well. I am a silly goose. I said I'd put the sawtooth edging at the end of yesterday's post, but I didn't. I am glad Kelli reminded me. It's really easy to memorize and works up fast, making nice right triangles. OK here goes:


Sawtooth Border Edging

Set Up: Start with all your last row of stitches on one needle, then CO 8

Row 1: PB, P1 (that's the stitch with the bead on it), K6, K2togW
Row 2 and every even row except 14: Sl1, K to end
Row 3: Sl1, K2tog, K4, K2togW
Row 5: Sl1, K2tog, K3, K2togW
Row 7: Sl1, K2tog, K2, K2togW
Row 9: Sl1, K2tog, K1, K2togW
Row 11: Sl1, K2tog, K2togW
Row 13: Sl1, K3togW
Row 14: Sl1, K1, CO6


Abbreviations:

  • CO: Cast on, preferably using knitted cast on. Alternative: backward loop cast on
  • PB: Place Bead (insert bead on crochet hook, catch next stitch on hook, slide bead over stitch, place stitch back on needle)
  • K2tog: Knit 2 together
  • k2togW: Knit last stitch of border together with next stitch on the body of the project (I admit I made that up)
  • K3togW: Knit last two stitches of border together with next stitch on the body of the project
  • Sl1: Slip 1
  • P: Purl
  • K: Knit

Please let me know if you try this and something doesn't work. Mainly I hope the set-up row is right.

Tuesday, July 31, 2012

A Second Hitchhiker, with Beads!

This weekend I flew to North Carolina to pick up my older son and his car, then drive back home together. The son formerly known as Tuba Boy in this blog (who should now be known as Mandolin Boy) did a 10-week internship in the Chapel Hill area at the place where his stepmom works. It was a great experience for him, and I am so happy he had the opportunity!

It also gave ME the opportunity to visit my own stepmom, who I had not visited since Dad's funeral trip. I was rather anxious about going back to where Dad used to live, but the memories were mostly good (she did get me a bit weepy when she kept trying to force memorabilia on me. But it was good to see my family and many of Dad's old friends.

Most important to THIS blog, however, is that I took along my Beaded Hitchhiker, since it was small and would fit in my small luggage. I enjoyed the conversations that the project started on the plane and in the airport. A couple of nice elderly women described complicated projects they used to make, and one assured me that arthritis had not stopped her, though she now crochets mostly. That's good, too!

I got to the end of the first skein while on the plane, and continued on while chatting with relatives until I had 42 points on the shawl. That's how many the original instructions called for, and sure enough, it was a good size with 42 points.

I then decided to add a sawtooth border to the cast-off edge. I didn't have any knitting books with me, so I made one up. I'm sure it's very similar to a lot of patterns in books--I am not THAT creative, but I did make it to where each edge had a bead on it. I will write down the pattern at the end of this post. Anyway, here is how the two edges compare. They aren't the same, but they work well together.

The two edgings on the shawlette. Left is part of the original pattern, right is what I added. Each has a bead at the tip.
 Of course, even with figuring out the pattern, it didn't take too long to finish the edging, so on Sunday I realized the WORST had happened! I finished the ONLY knitting I brought with me! I was glad I brought my Kindle. But I sure could have gotten a lot of knitting done on my 12-hour car ride yesterday (Mandolin Boy drove yesterday, and I drove today, only 8 hours or so).

Finished product, folded in half


So, here is the finished item. The colors came out oddly when I took the picture at my stepmom's, but I tried to correct it. At the end there were some pools of orange, but I like them, so i kept them. I didn't straighten out the points, oops. Let's see, how about another picture?

Here is is outdoors and more spread out.
I like the way it looks with more points on it, at least from a distance. You can't tell the size difference so much. I am very impressed with how this particular sock yarn worked out in the Hitchhiker. It really made a nice even blend of the greens and oranges. And the two colors of beads I used also were perfect. They were the same muted green and orange. Really love this item and can't wait to wear it. 

What does it look like on, you ask? Well, I think I will be wearing it a LOT this fall. I happened to have on a coral outfit Sunday, so I put it on.

Suna looking haggard, but with a nice shawlette and a shiny shirt.
Wow, those wrinkles, that giant nose, those droopy eyes (another thing I inherited from my Dad is sagging eyelids), those bunny teeth--I was obviously pretty darned stressed out and not at my shiny, perky best, even with the shiny shirt on. But, isn't the Hitchhiker nice? I love the way the edges curve, and I love having the points on two sides. The smooth edge makes a great side to aim at the neck, too. I really look forward to wearing this often!

What's Next?

Well, I need a big project, since I finished the Shadow vest, and I need a small project, since I finished this one. I have things all lined up, or mostly.

My big project will the the beautiful Reine from the Brooklyn Tweed Wool People vol. 3. I've already got the yarn, Loft by Brooklyn Tweed in the Snowbound Colorway.

Yarn and pattern
I am sure that most "connected knitters" already know about this pattern and this wool, but if you don't know, the wool is from American Targhee-Columbia sheep and spun in the US in an old mill. I love that. It has nice irregularities and flecks in it. The cardigan has cabled edges along the front and pockets. There are really simple but classy looking purl ridges along the cuffs and on the shoulders. I'll be honest. I just want a bunch of cardigans to wear.

I also want more of these little drapy scarves. I ran across a pattern on Ravelry that I thought would be cool. Little did I realize at the time that half the people on my Ravelry friends list had already bookmarked or were making it (or so it seemed), including most of the people I used to knit with. Oh well, I may be the last on the bandwagon again, like I was with Hitchhiker, but I will make it anyway. It's Unleaving from Knitty's First Fall edition. It is also garter stitch but with a nice lace edging. I now just have to decide which sock yarn I want to make it with. I might just pick one of the ones with silver in it. Not sure, though. I will have to chase zillions of young adults out of the yarn room to find something! I do know I want a semi-solid, but don't want to use my brown one due to planning to use it as an edging on the fall shawl I am also still plugging away on.

Now that I am no longer "competitively" knitting, I don't know what's popular with all the knitters who hang out together or spend a lot of time reading blogs, hanging out on Ravelry, or participating in email lists. I realize that I am just fine with that--I am knitting what I want to, when I want to. I am not trying to make the fanciest or hardest thing--I am making things I think I will enjoy making and use when I am done. Whew. I think I have attained my own "gold medal" for knitting enjoyment.

And yeah, I am watching the Olympics, even if I am peeved over the "Ravellenic Games" thing. I just am no longer into competitive knitting!

Sunday, July 22, 2012

A Silken Shadow

It was a good knitting weekend, since my friend Pouri (mom of our house guest Elmira) was here cooking amazingly delicious Persian food, and she also knitted a bit with me. She was trying to make a simple-looking cable scarf, but the "free" instructions from Michael's were all in prose, plus she wasn't familiar with American knitting abbreviations and terms. It was slow going. I KNOW if I'd had a graph, it would have been easier for both of us!

Because I had knitting friends, I got a lot done--so much, in fact that I actually managed to finish something! It only took me a month to make the Shadow vest out of Shibui Heichi (raw silk). Here's a nice photo of the yarn.

You can see all the extra colors in the yarn. And dog hairs. Thanks, Scrunchy.
The yarn looks great in seed stitch, and it has a really nice rustic texture. However, it is a bit hard to knit with. You really have to tug to get the yarn to go all the way through the stitches, as I think I mentioned before. I think I managed to make adjustments so there aren't any big ugly holes. The small amount of yarn in each skein meant a LOT of ends to weave in, too. I may actually end up dabbing Fray Check or something on the ends to make sure they stay put.

After I finished the vest, I took a picture of it, which was spectacularly unsuccessful. It's a rather large three-layered rectangle, and you can't see the nice row of cables going up the side, either. Here it is, against one of my now-traditional loud-patterned tablecloths.

Shadow on the table. Hey, there is my foot!
Well, that's just not a great looking item. It does show you just how much seed stitch this thing entails! I sure am glad I knit continental! So, I guessed that, even though it was 100F outside and it is the blazing middle of summer with incredible humidity, I was gonna have to put it on and get photos.

My dear spouse did try to take some pictures inside the house. While I look smashing, other than my giant humidity hair, you can't really see the garment.

That's me in skinny jeans in a blurry vest.
So, we reluctantly went outside and stood in front of the neighbor's garage door to get better photos. Now you can see the vest. I wanted side views, too, so maybe the cables would show up.

Side view. Can't see the danged cables because of my arm. Why do I have arms? Oh I need them to knit.

I look so festive. I like how the vest hangs, so it does not look so square.

Why yes, this IS the front view. Ah, do I feel a little nip of fall in the air? Why no, I don't.

The back. Wow, my hair is long, and wow, it looks like I have chicken legs, just like my son does in his skinny jeans. Only his legs are a lot longer.
Well, I hope you enjoyed this tour of the Rusty Shadow vest. I was about to pass out from the heat, so I also hope you appreciate the sacrifice I made.

With that project over, I am actually STILL plugging away on the second Hitchhiker shawlette. I usually work on it in the car or at meetings. Next weekend I am going to North Carolina to pick up the older boy, who's been there all summer doing an internship. I will also be visiting my dad's dear widow, Flo, so I predict lots of knitting time. Since I'm flying, I will just take that small project with me. I probably mentioned already that I am going to give her one of my place mats.

I did finish weaving the two jewel-toned place mats in my second batch of mats, and am starting one of the yellowish sock yarn. As I do these next three mats (repeats of the first bunch), I am trying to figure out what size I want the matching napkins to be. I could make little 10" x 10" napkins (I have some that size that I bought in Mexico), or I could make bigger ones. I have to practice actually making a square!

The weaving is improving. My edges look a lot better on this batch.

So...what's next in knitting? LATVIAN MITTENS. That yarn is sitting over on my dresser LOOKING at me, so I better make up four cute little Latvian colored wool balls and get to work on those. I love the color and patterns so much! I know I don't have lots of reasons to wear mittens. But I sure do love to make them.

Thursday, July 19, 2012

I Made Place Mats!

I finished my lovely sock yarn place mats on June 25, but never shared photos. What a slacker blogger! They came out pretty good for someone who's still learning. And we have been using them on the table ever since! In fact, we like them so much that I have warped the loom with more red yarn and am making additional matching mats.

I did a particularly bad job taking pictures--why I felt compelled to put the busy place mats against an even busier table cloth for photography is beyond me. So, your eyes have been warned!

A place mat!
This is a special edition Opal sock yarn. It really went well with the red, I think. The next one is more subtle, but I happen to still like it, with its consistent red dots:

Little red dots
This was my first one, and I thought I'd like it best, but instead liked it least.

More stripes
Everyone liked this last one the best, but it's too short--I ran out of warp. So, I am going to give this one as a gift, and have already woven two more using this Regia Kaffe Fassett sock yarn to be the place mats.

Jewel Tone Stripes
I think the hemstitch edging looks nice, so I am doing it on the next batch, too. I'll end up with 8 place mats, so we can have company. After that, I plan to make matching napkins. I will have plenty of sock yarn for that, since they will be a bit smaller. By that time, I think I will be tired of the red warp yarn and ready to move on to another fun thing, whatever that may be.

Also...KNITTING

I have not forgotten my knitting, and in fact have made good progress on the Shadow vest in Heichi. It just does NOT photograph well, so imagine acres and acres of rust-colored raw silk seed stitch, and you will have a good idea of what it's like. I'm on the right front, and when that's done, all that is left is to knit the substantial collar, which is what turns it into a garment rather than an awkward mass of fabric.

The Heichi yarn is sure expensive. Each $14 skein knitted about 3 inches of body! So, I'll have to be careful with the vest--it's an in"vest"ment. The only problem I am having is that the yarn is so textured that sometimes my purl stitches don't pull all the way down, so they end up loose. And every little uneven bit is very obvious in the field of K1 P1. I think it will get better in blocking.

And Teaching

I am proud to say that my latest two knitting students are doing well. My coworker Stacie is still powering through a brown garter stitch scarf, and the summer resident Elmira has even learned to purl--she made a rectangle!

Her first finished object
In addition, she is making a really pretty garter stitch scarf out of some wool/cashmere multi-colored stuff I could not figure out anything to knit from. The colors are pooling in a really interesting way. I'll have to get a photo. She has the yarn to make a K1 P1 ribbing scarf next. She likes knitting, which make both me and her mom happy. It's nice to all sit around and knit! I'll miss knitting with her when she moves into her own apartment in September.

I hope two posts in a day make up for a month with nothing! Keep knitting, crocheting or weaving, friends!

Latvian Fun

My friend and colleague, Mike, went to Latvia on vacation, to visit his former exchange student. I knew there was a strong fiber arts tradition there, so I was very excited to find out what kinds of things he'd discover (also he discovered beautiful scenery, castles, museums, churches and monuments...but the fiber stuff was what I was mostly interested in).

I got a taste when he posted this picture to Facebook:

Learning to weave in Latvia
Someone's learning to use an inkle loom! Later, when he came back, he showed me some amazing photos of exquisite weaving, many pieces with gorgeous crocheted borders. There were also some really cool crocheted lace outfits, and wonderful traditional knitting. I sure appreciated those photos! And to prove how much they value knitting, check out the plane ticket he's holding here:

Air Baltic, they love knitting
Yes, that's a two-color knitting schematic on the border! You have to love a country that values its crafts so much!

My surprise when he got back to work was this:
A box!
What an intriguing box! That shape is familiar! What's on the back?
Seeing that made me happy
Hooray! It's a genuine Latvian mitten kit! How cool is that?
Inside with translations of motifs
Inside the box was a lovely card that translates all the traditional motifs and what they mean (the swastika was a GOOD thing in the olden days). On the right is the instruction booklet, which tells you exactly where the original mitten came from that the pattern's modeled on.

Yarn!
And of course, there is lovely, rustic two-ply wool to knit the mittens from! Won't that be fun? I am looking forward to stylish new mittens in the fall. Mike also got a kit for our boss, who is also quite the knitter. What great gifts.

And on Another Continent!

Mike is not the only friend to go on a cool vacation. Sylvia went to Ecuador and spotted this:

Loom action!
This guy is weaving so quickly that his hand is a blue. I have a similar piece of fabric from Mexico. If you look carefully you will see he is also wearing a hand woven belt.

It's so nice to have friends who remember your interests and share what they see with you!

Now to write another post about my knitting and weaving. I've been so busy DOING stuff that I haven't had time to write about it!

Monday, June 18, 2012

Finished Products!

This weekend was a productive one--I lucked out and had four days off in a row, and the fun activities I'd planned (a trip to the beach, etc.) got canceled due to unforeseen circumstances (a sick spouse and a very old dog with severe issues). This meant I could work on my crafting a lot.

First, on Friday I finished the chenille washcloths I was weaving. That poor project was really, really a learning experience.
Washcloths taken off the loom on the railing in front of Yarnorama
When I was "finished" I discovered that, in addition to the mistakes I already knew I'd made, I had use the cotton that was supposed to be the warp as the hem and the yarn for the hem as the warp. Oops. And I had totally forgotten to put a row of a contrasting color between cloths to make for easy application of Fray Check and subsequent hemming. And to top THAT off, I had mis-remembered the instructions and not woven enough picks of the hem.

Saturday

I took the loom and cloths off to Yarnorama (which is looking great after remodeling) to make sure I finished it right. I am sure Susan laughed at me internally when she saw how much I had been oblivious to her carefully written-out instructions. Then I went ahead and cut the cloth you see above into separate washcloths. However, since I didn't have the convenient contrasting color to mark the part with Fray Check on it, I missed, causing much of the fabric to unravel. Sigh.

So I stuck the poor li'l washcloths (one of which is a hand towel, because I made it longer on purpose) in my bag, and decided to move on to the next thing. Perhaps I'd be more successful warping the loom if I had help. There were a couple of other people at the yarn shop with their Cricket looms, so I knew there was back-up (though one other woman was only on her second project, too). I found some nice red sport-weight wool that I thought would make a great warp for placemats for our kitchen. I wanted to warp it to use with sock yarn, so I got the 10 heddle out.

First, I brilliantly WATCHED Susan warp her loom. That helped me do mine. I did it right this time, and Susan helped me with the tension.

Correctly warped loom, or "dressed" as they say
The other thing I did at Yarnorama was to get more yarn to finish my little silky cardigan. I needed nearly all of an additional skein to finish it, even though I was making the smallest size! I worked on the last arm a bit while I was at the yarn shop, then came home and did more.

And Then Came Sunday

On Sunday, Lee and I went to see his dad for Father's Day. Since there was a lot going on there that I wasn't supposed to be involved in, I had a lot of time to knit, both in the car and in Yorktown. In rhe car, I patiently and with great difficulty finished off the washcloths. They do not have the hem they are supposed to, but they won't be unraveling. Since I took this photo I washed them and trimmed the ends where I changed the yarn, and they look fine. They will certainly make nice soft things to dry off with or clean up with. And I learned a lot from the project!

Washcloths and the little towel (the one on the left).
  When I got to Lee's dad's house and was chatting with the old fellow (just turned 89 and doing much better after his bladder cancer bout), I finished the cardigan. Adding the neck edging really made it look better.
Before the neck edging was added.

After adding the finishing edgings. And smiling because people told me the previous photo was a bit scary.
There is also a slip-stitch crochet edging around the sides and bottom of the cardigan. It's quite small--I might have needed yet another skein of Heichi if I had made the medium size.

After finishing up with the Heichi/Silk Cloud cardigan, I went back and worked on the beaded Hitchhiker and got a few more points done on it. I am getting close to the end of the first skein of yarn on that one, but I am going to add a few more, then I think another pointed edge on the cast-off side. What the heck.

When I got back I was pretty stressed out, but I used my lovely new Soak washing liquid to wash up both the washcloths and the cardigan. The lovely scent helped with the stress. The cardigan is still sitting on the dining room table drying. I sure wish I could find those darned blocking squares (so I can finish the drape front sweater!).

Today Is Monday!

Today was full of worry about our dog--we didn't know if we'd need to euthanize him today or not. Much of the day was spent waiting for a mobile vet (the part not spent taking the daughter of an old online friend from the Dysfunctional Nonprofit Organization out to lunch). I started on the sock yarn plac emats to distract myself. I think these will be a lot of fun. The plan is to use the red warp on each of four mats, but use a different one of my MANY self-striping sock yarns as the weft for each of them. I started our with an extremely yellow ball of Opal with lots of little stripes, along with some green. Here's the very beginning:

Beginning of place mat
You can see the sock yarn, and a bit of how it is working out with the red. I've done about 11 inches of it now, and the colors look really interesting. Some of it looks like tapestry weaving. I am doing a fairly loose weave, but am pretty sure it will fill out more once I wash it. I don't want very thick mats--I might do that later.

If you look at the bottom edge of the weaving you can see I tried a new skill for me, which is hem stitching. I think that will look great. That way I won't have to knot the fabric at the end, and the fringe can be nice and smooth on each one. I do hope I was able to follow THESE instructions correctly. I used a book called Weaving Made Simple for nice clear instructions.

I'm feeling a bit better about weaving. At least even the icky things I made are useful. And they don't have to be perfect.

On the other hand, I can still knit, at least simple things. Next on the list is another garment made from Heichi, this time in a rust color. It's a cool vest called Shadow. I will really enjoy wearing it, I think! I have a feeling I will enjoy the yarn more when I use smaller needles.Those huge needles and the loose gauge on the previous cardigan were not easy on my little hands!

WELL, glad I finished some stuff at last. I honestly feel better about many things. I also know I have so much still to learn. Those people who are good spinners and weavers are really amazing.

Tuesday, June 5, 2012

Challenging Weaving, Happy Knitting

Announcement: I have a huge sense of empathy for all the people I have taught to knit or crochet who have been frustrated at how often they wrap the wrong way, drop stitches, accidentally increase, or whatever. It had been so long since I learned the basics of these crafts that I forgot how challenging it can be to start out.

Starting out with weaving has taught me a lot! I do think now I will have to work hard to find a new wrong way to warp a project, but it won't surprise me in the least if I do something weird again next time!

In the good news department, I did finish weaving a starter scarf. I did go out to Yarnorama in Paige again, where the ever-patient Susan did NOT laugh at how I had the warp winding the wrong way, which explained why the ratchet dogs weren't ratcheting. She got me wound the right way, and even gave me some cut-up plastic mini-blind blades to make the tension good. Hooray for her! Here's the project in progress. By the way, this worsted weight wool comes with the Cricket loom. I didn't want you to think I chose the colors.

My first weaving project. Extreme close-up
I did not do too swell of a job on the selvedges, but I got better as I went along. I also missed a couple of warp threads, even though I tried to fix them when I saw them. I guess it's a learning process. One good thing is that weaving goes pretty quickly, so I got this out of the way in just a few days. It's also fascinating to cattle, which I discovered while weaving in the pasture at the ranch.

After I finished off and washed the project  I realized a couple of rows (picks) had gotten pulled in tightly somehow. I'm not sure how that happened, but it does not enhance the final product. It's also very long, because I mis-measured the warp. Oh well, it will serve as a scarf. Some people even say it looks pretty good.

Finished scarf. I think this is before washing and ironing it.
Of course, I wanted to start a second project right away, but I dawdled a bit and waited until last weekend.  I wanted to make the project I'd gotten the yarn and instructions for when I bought the loom. It's a collection of chenille washcloths, and both Susan and Deana said they were great beginner projects, because the chenille is forgiving. A couple of other customers at the shop (really GOOD weavers) said they had enjoyed doing the project--they came back for more!

This is when the comedy of errors commenced. My biggest issue is that I refuse to put a set of large photos of how to warp a loom next to me while warping. Well, make that a past refusal. I will from now on. The PDF of the Cricket manual was on my computer, so I kept walking back and forth to and from that, being too lazy to go find the nice book I had gotten, The Weaver's Idea Book (go buy it if you want to get a Cricket loom and make stuff!), which has nice, big photos and clear instructions.

First mistake: I got a nice cheap vinyl mini-blind and measured it against the heddle (the thing that you use to move warps up and down so weaving is easy, and that you also use to "beat" or press down your weft). I cut about half of them before realizing that the part of the heddle (see below, thanks to the blog of Spinninglizzy for the image)...

Rigid heddles
...that is 15 inches is the white part, not the wooden part. So I got to cut most of them twice. Lots of little pieces of plastic all around. Why the mini blinds? Susan says they work better than stiff paper or anything else she has found to insert in the wound-up warp and keep the threads nice and tight. Anyway, eventually those were all good.

Second mistake: I wound the warp around the large back beam, not just the little bitty apron rod. I discovered this after winding a whole bunch of it, and sticking a whole bunch of pieces of mini blind in there. This meant I had to enlist my patient spouse's help to unscrew the back bean so I could slip off all the loops and put them around the apron rod instead. Of course I twisted some of the loops, which added to the fun. And I totally missed a couple the first time. But eventually, I persevered and got the warp attached to the correct thing. I managed to attach the other end fairly successfully, and wound it all up.
Parts of the loom, from Cricket Loom Assembly and Weaving, by Schacht


Third mistake: After all that winding, I realized that I had strung the whole thing backwards. The end that should be on the "front" of the loom was on the "back." If I had looked at the picture, I would have known. As it is, I didn't realize it until I tried to weave. There was no space to insert the shuttle. Sigh. Luckily I realized that all I had to do was wind the WHOLE thing again, the other way. I didn't have to take anything off the loom. So, in the end, what should have taken about a half hour, warping the loom, took an hour and a half. I did not weave at all on Sunday, but the dang warp was ready!

I did successfully pull threads through the central holes with only one or two small glitches. Oh, I rock.

I came home last night and finally was able to weave. I got the waste yarn on, which took care of some of my weirdly twisted warp loops, then I survived a recalcitrant yarn winder and got the hem yarn wound into a ball and then onto a shuttle. I made a hem! And the selvedge is not horrible! Then, gasp, I wove some of the chenille! Here it is:
washcloth, in progress at last

KNITTING!!

I have not stopped knitting.  However, I don't have any great photo of the Heichi #5 cardigan in progress. I think it's going to be a good one, though. I made it through the underarms and got the left front done. I am over 50% through the back. It looks like another good spate of knitting (perhaps I will be stranded at an RV repair place for a couple of hours like I was last weekend!) and I will be finished with the body. The sleeves are 3/4 and knit by picking up from around the armholes, so they won't be hard to do at all or take long. There's a crochet border that doesn't look like rocket science, either. So, maybe I will have this project to wear at the office when it gets chilly--soon!

I'm also continuing to work on the second Hitchhiker shawlette. It's my "portable" project, and I carry it in a cute Lantern Moon bag. Here's what the shawlette looks like:


Hitchhiker with beads, and my office chair
The colors really mix up nicely. Not too much pooling at all. And the beads really are perfect, though hard to see in this photo.

I probably have something else to say, but need to work now. Lunch is over! Oh, if you get a chance, look at the latest Interweave Crochet. The modern Irish lace photos in it are just stunning.

Friday, May 25, 2012

May Knitting but No Weaving

So...what have I been doing? I have been knitting a good amount!

I actually did finish the drape-neck sweater. Where are the finished photos, you wonder? Well, while I finished KNITTING it, that doesn't mean it's put together. I still can't find my blankety-blank blocking squares. I am thinking the only way to find them is to buy some more. Then they will turn up and I can knit an immense item and block it. I am going to look in ONE more place, then order more. I have two shawls to block still and one was for a gift for someone else. Ugh.

In a happier vein, I did indeed start a second Hitchhiker shawl, this one with beads, which I keep trying to spell "beeds."

Extreme close-up of Hitchhiker #2 on a good book.
I got the beads at local bead shop Nomadic Notions, if you want to get some for yourself. I am alternating an orange-ish bead with a green-ish bead on every other point. This picture has more accurate colors:

Little shawl in progress. Book is called Healing Spices, and it's wonderful!
The yarn is the Araucania Huasco, fingering weight that I got two skeins of when I went to Old Oaks Ranch. I feel proud for using yarn soon after I bought it. I figure with two skeins, I can make the shawlette a little bigger, and still have enough to also make hand warmers or a hat.

I do have another project (in addition to that fall shawl that gets a few rows a month knitted on it). You see, my lovely summer house guest, Eli, and I took a road trip last Saturday.
The Graduate
She's the older boy's college friend, and she graduated a year early. She's doing a couple of summer classes and an internship, so we offered her the guest room, like we did last year.

Anyway, she agreed to drive all the way to Paige to check out Yarnorama, since my other knitting shop checker-outer friend keeps having to do things with her KIDS, sheesh. She had never been to a yarn shop. Shocking, and she made it to age 21!

I'd gone out there because I had a sudden urge to buy a Cricket loom. I want to weave placemats and napkins and such, and I want to use up some of my incredibly large stash of sock yarn. I have seen some really nice scarves (Yarnorama has some nice samples Susan the owner made) from sock yarn.

Of course, while I was there, I looked at yarn. They'd recently had a Shibui yarn trunk show, so had some really  nice patterns and yarns. I got yarn to make two items. One is a really interesting vest from their Heichi booklet, called Shadow. It's made in Heichi, which is a raw silk tweedy kind of yarn. I got rust colored yarn for that one.

I also got more Heichi and also some Silk Cloud to make a very light-weight cardigan from one of their booklets, No. 5, from the Spring Summer 2012 leaflet collection from Shibui. Here's what it looks like so far:
Good Ole #5

Up close you can see the halo from the mohair in the Silk Cloud. It is a very loose knit. The pattern says use a size 11 needle, but I am using a 10.5 needle and getting gauge. It's knit in one piece bottom up, then you sew the shoulders and knit the arms down from the armholes. What gives it some definition is a simple crocheted edge. I get chilly a lot at work, and my Wrap Me Up shawl helps, but is bulky. I hope this will be a perfect work cover-up. Note that the sweater has fake side seams. They sure would be easier if the slipped stitches were done from the front, but NOOOO, they are done from the back, which means it's harder to see when to do it. That's why I put markers in.

Yarn to teach Eli to knit was also purchased. She volunteered, honest. I think her favorite part of the store was the angora bunnies, however. Still, Yarnorama was looking great, considering they'd been hit by lightning not too long ago, and all their electrical components went wonky. I heard today they have air conditioning again! Yay! But it wasn't too hot--those old Texas buildings had good circulation.

And yes, I got a loom, one of the new 15" Cricket looms. It will be easier to make place mats and even garments with that size loom. Unfortunately, even with helpful lessons from Deana from the Olden Days (it was so good to spend time with her again), and Susan, I had trouble getting started at home. Either I am messed up, or the loom was put together funny. I'm hoping to take it in tomorrow, since I am no longer going to our ranch this evening.

Ranch??

Ranch. Yes, we now own Hermit's Retreat Ranch, which is adjacent to Wild Type Ranch in scenic Milam County, Texas. We bought a chunk of our friends' property, with a pasture, a woods, a pond, and meadows. We will eventually build a place to retire there...with an entire fiber room, I promise! First we need water, electricity, and septic. One thing at a time! If you are interested in following along with our adventures, visit the blog where we've been chronicling our RV adventures. It will now have ranch adventures, too!

Wednesday, May 2, 2012

A Shawlette to Hitchhike In

I really have had a hard time knitting lately, since we have remodeling going on in my bedroom and bath. It will be nice, though, and my hand knits will have storage space! We got two under-the-bed storage boxes, plus there is a lot more space I can USE in the closet, or will be when they are done. I got rid of about a third of my clothing, and packed things I won't be wearing anymore into neat boxes labeled "long-term storage." So, some of my ancient knitted items are now there, stored for posterity.

This, however, is a finished shawlette!
Hitchhiker!
I got 40 little points on the end of my Hitchhiker shawlette, using the Zauberball Crazy sock yarn. I love the stripes. All lovely shades of blue that will go with denim nicely. I used size 3 needles, so it's loosely knit (remember, I use 0s for socks). I truly enjoyed the pattern (it's on Ravelry so you can buy the pattern and make one, too). And it is quite easy. The only trick I had to do was learn to count four garter stitch ridges so I'd know when to bind off to make the points. I can count to 4!

And here's what it will look like when I wear it:

Me ready to Hitchhike
There are so many options--but it looks fine with a white t-shirt! Wow, my hair has gotten long.

I wanted to start another one and put beads in it, but now I think I'll just make another plain one. I have two balls of the yarn I am thinking of using, so I will make a bigger version to throw dramatically across my shoulders, and perhaps end up with yarn left over for mitts or something.

What? Did you ask why there are no finished gray alpaca wrap sweater photos? I am still almost done with it. I have knitted some more, I think up to 34 inches of the endless 38 inches of stockinette for the front. I do hope this weekend will be the weekend of finishing.

Blocking is another issue. I can't find my blocking mats. Nor is there any flat space in the house right now, because we are sleeping on the guest bed, and the college kid's bed has all my clothing on it. I have two shawls to block for my friend Diane. I even have some new pins. But nowhere to block. I really hate it when I let people down (and wow, do I do it sometimes!). She really needed a shawl blocked last weekend, and I couldn't do it. Sigh. It will look good eventually, and so will my alpaca sweater. No need to be hard on myself.

I've been telling a bunch of people to not blame themselves for other people's issues. Well, I need to admit my shortcomings and just do my best, anyway. We are all fine folks who slip up occasionally, right?

Thursday, April 19, 2012

Enthralled with Hitchhiker

I am supposed to be finishing the lovely gray alpaca sweater with the big twist in the front. May I just say, in way of excuses, that 38" of plain stockinette can get tedious? There I did say it. I have over 30" of it, though. I was hoping to buckle down and finish it while traveling this weekend, but we may not get to do that. It's hard, though...

...And the reason it's so hard is I am enjoying knitting the Hitchhiker shawlette or scarf I could not resist casting on for. WAY too much. Once I started it, I could not stop. Here it is started.


 It is amazing how many different shades of blue are in this one ball of Zauberball Crazy sock yarn. I have done 30 points on the Hitchhiker, and nothing's repeated yet. Such fun yarn. I don't have a great photo of it, but here is is, posing next to Scrunchy, making it clear that he has exactly one eye now, thank you very much.

Scrunchy complements the white stripe in the Hitchhiker very well.
It's getting pretty long--and it looks to me like there's enough of the yarn left to get twelve more points out of it. In any case, I think it will end up plenty long enough to drape jauntily around my neck.

I want to make about five of these. Beginning knitter? Don't let that stop you--it's pretty darned easy! And everyone who looks at it get a glazed and jealous expression on their faces. Men and women. What a great gift this would be!

However, I'm keeping this. Since I have LOST a bunch of my shawls in the Great Wildfire Scare of 2011, I need some warmth. (I know my shawls are in this house somewhere--just can't find where I put the shopping back full of hand knit and hand spun goodness.)

I must get back to the knitting. I would vow to not work on this blue beauty until the Drape Front sweater is done, but I can't. I do vow to try my best to finish it this weekend.

Saturday, April 7, 2012

Instruction Reading & Checking Out the Alpacas

I learned a lesson, or was reminded of a lesson, yesterday. I was all happy to be finished knitting the drape front sweater, and thinking about blocking it. But I laid it out, and twisted the front, and thought to myself, my, how awkward this is. Then I looked at the pattern again. Well, would you look at that? The body width of the back is 19", while the body width of the FRONT is 28". No wonder I'd ended up with almost two full skeins of the yarn left over! What a doofus I am! The pattern is so simple; I just knit the front to match the back and didn't actually read the instructions. Yes, those very instructions would have made it clear that I needed to keep a-going on that endless stockinette section until it was much longer!

I have undone the second sleeve and am back to knitting plain ole stockinette for another long bit.

Lesson learned: READ THE INSTRUCTIONS.

And Now for Fun

I enjoyed some of that stockinette knitting in the car today, as my knitting friend and I, along with her two young daughters, made the trek out to Old Oaks Ranch to see how the alpacas are doing, and what kind of stuff they have in stock. If you've been reading this blog a really long time, you might recall that I went there with Lee in 2009. Three years later they still have most of the same alpacas. There have been changes there, but everyone is still very friendly, and we had some good conversations.  We took the paid tour, just the four of us. We got to watch two of the boys get shorn. Here is one in progress.
Sorry about the fence, but you can see all the people holding down an alpaca while a very strong woman shears him.
And here is one fellow just after being shorn and spitting in a guy's face. He seems quite pleased with himself.

Look at me! I spit in the face of the guy on the far right!

The girls had a complete blast. They got to pet and feed the females, who had all been shorn earlier in the morning. The alpacas were nervous, but settled down pretty well. So nice to see some of the same ladies as last time!

Getting ready to feed the Big Mama, Mariposa. The little boy is the grandson of the owners, and he was really "helpful" in the tour. The lady is the daughter-in-law of the owners. The is demonstrating proper alpaca handling technique.

I do love looking at and petting alpacas. However, the folks at Old Oaks did remind me that they would prefer to be by themselves, and are only happy in groups of three or more. That can run one up into big bucks!

Luckily, llamas are a different story. Their llama had also just been shorn, and I found him especially fetching, since he was spotted in the same way as my donkey, Oscar, America's Cutest Donkey. They also had a fine donkey, and the girls got to feed her carrots, vaguely successfully.

I admit these are also cute animals.
The donkey and llama serve as guard animals and keep coyotes away from the alpacas and chickens. They also have a big guard dog, who was very friendly (unlike the previous guard dog they had). He is also a Great Pyrenees, so huge and fluffy! The girls want a pet dog, so they began to lobby for one of those, but it will not be happening.

The last stop was at the hen house. I wish I had taken photos of it. They really did a cute job on it, and it was quite the palace, for a chicken abode. Each child got one egg, so that is good (the little boy family member broke his--he was quite enthusiastic).

After the tour, the folks in the family patiently went through a fiber demo with the girls, who really seemed to enjoy it. That gave me time to look at the yarn and other merchandise. I ended up getting this Auracania Huasco yarn, a fingering weight merino. I hope I can make a second Hitchhiker shawl from this. Of course, that would also require me making the first one.  I hope to start one today. And if the shawl only takes one skein, I will make socks.

Araucania Huasco


The lady at Old Oaks send us off to the Leaning Pear restaurant in Wimberley, which was a great place to eat, featuring locally sourced ingredients and interesting flavors. We even managed to have adult conversation during the meal. All in all, it was a fun day, and now I can do more stockinette knitting.

Hope your Easter, Passover or other significant holiday went or goes well! Happiest of greetings from this UU, who will attend the flower communion tomorrow.