Showing posts with label Converging Rib Socks. Show all posts

Friday, March 13, 2009

Converging Ribs Done! And Finding New Projects

I did finish my Converging Rib socks on Wednesday and am wearing them now. They fit really well and look smart and stripey. I regret that I don’t have a photo of both of them, but it has been raining here for three days, and I am trying to get photos of them in the right light so the patterning will show. I really need to design socks using less patterned yarn, but in my defense, when I started these I wasn’t going to do the fancy decreasing, but rather plain ribbed socks. That does mean, though that I have completed one whole pair of socks this year. My previous pair had actually started in November, because I dawdled over it. As a reminder, I put a little recipe on how to do these socks in the blog a few weeks ago. A couple of people have asked me to link it on Ravelry, but really it’s not a pattern—just hints for doing the design element. Maybe I will just go ahead and do it. If it's boring, no one will make it, and that's fine.

I think I’ll go faster on the next pair, the Charybdis , that I mentioned last week was designed by Fiona, who was inspired by my Glacier Lake socks to design her own pair. They are lots of fun, and look way more complex than they are to knit—just what I like in a sock! I may even go ahead and do the short-row heel, just for a change of pace. It’s nice to get back to toe-up socks, since I took a little break from them with the last few pairs.

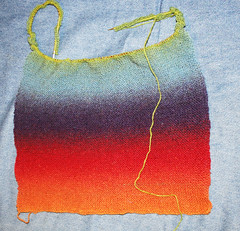
There are a couple of factors that I hope will keep me interested in these socks. First, the yarn is very different. As I mentioned in a post a little while back, it is Araucania Ranco Multy, which comes in all sorts of nonstandard colorways and is randomly dyed, with lots of splotches and spatters to break it up. The colorway I picked is one I got fairly recently from The Loopy Ewe, even though I already had two skeins of it in my stash. I just liked the way the aqua and lime green blended with the more dominant berry color. So far, it’s just fine to knit with, not splitty or harsh.

Note: I took a picture with my camera phone of the sock toe and have tried to email it to myself, but it isn’t here yet. So, come back later to see the work in progress.

The knitting itself is interesting because I decided to use my new needles that I got at Fibers. They are Chiaogoo stainless steel circulars in size 00, which I hope will make my sock gauge just a little tighter than it has been lately. I am very fond of the clear nylon cable on these. It’s a bit more flexible than KnitPicks or Addi Turbo, but not as overly flexible as the Kollage square ones. This means that I can push the yarn toward the tip without the cable bending back on itself like the collage ones do, but it doesn’t annoyingly insist on poking out like some thicker cables do. I am, however, not sure that I love the slightly bend tips. They remind me of some of those old Aero aluminum or nonstick needles. However, I am getting used to sliding the yarn around the bends, and it isn’t slowing me down. In any case, it’s always good to try a new needle, in case you love it. And these were not at all expensive (I actually think they were just $5), so I didn’t break the bank getting 00s and 000s. That’s a bargain compared to some of the other needles I’ve bought!

I have a tiny project I will probably work on Saturday, then I should be heading into my next UFO completion project, the Itchy Shalom. More on that later!


What Are You Doing Next?


Looking for things to knit? Here are some online magazine ideas (some of which I have already discussed in greater detail, but wanted to group together):

  • Spring 2009 Knitty , featuring a scarf called Fit + Flirt by my friend Birdy in San Antonio and the lovely Decimal sweater by an Austin resident.
  • Spring 2009 Twist Collective, which also has some great patterns, including good ones for guys.
  • Spring 2009 Knotions, which has a lovely scarf and socks, plus a “Spring Kimono” that reminds me of the Decimal pattern, in that it will look good on petite or statuesque folks.
  • Ravelry, every day: What I do most days is click the Patterns tab, then click the small link above the selection of latest patterns that says “see more.” This shows you everything that’s been added, from most recent to dim past (if you have the patience to click that long). It’s a fun way to find inspiration, or to see if someone just published the idea you had (has happened to me). And it can give you a good laugh sometimes. For example, this morning I went to look and up popped a crochet pattern that I think was supposed to be a calla lily, but looked to me like the cup on a lacrosse stick. Ravelry will eventually have all the patterns in each of the other things listed above, but you would miss the articles, so do the advertisers a favor and check out the online knitting zines! I must say I enjoy the ads, too!

Question of the Day: What online knitting magazines have I left out? Tell me more!

Monday, February 16, 2009

I Can Knit a Rainbow!


Kauni Cardigan Sleeve
Originally uploaded by sunasak
Thank goodness I have knitting. When everything else in life seems to be out of my control and I feel like I don’t even understand the English, my knitting is there to comfort me. And even with all my recent backtracking and re-knitting, I still feel like this activity is something I am competent in and that I can be creative with—with some modicum of control (admittedly, some of the stuff I can’t control, like how stripes come out, is what I like best). My knitting was the definite highlight of the weekend.

I got a bit done on my second Converging Ribs sock. You will be pleased to know that my instructions work so far. I’m almost finished converging, so it will be a simple task to finish it, when I stop obsessing over Kauni.

Yes, the thing in the photo has me totally thrilled. Indeed, that is a sizable garter stitch rectangle (with some increasing near the top). But wow-ee that was one fun rectangle to knit. I couldn’t wait to see how the next color would show up. The rectangle is actually the first sleeve of the Kauni jacket (again, it is this pattern , and the green squiggles on each end of it are the first three rows of both the front and back of the vertical side of the jacket.

Of course the striping pattern is going to change considerably now that there are three times as many stitches per row as there were before! I can hardly contain my excitement at the idea of the skinner stripes, and how they will look. Then, when we go to the other side, there will be medium stripes on the horizontal body piece, and thinner stripes on the sleeve. Hee hee. This makes me practically giddy with excitement. Or it would if I wasn’t still feeling overwhelmed from a challenging weekend—one in which I passed by a chance to go to a yarn shop. Yes, I was mere blocks from Hill Country Weavers and didn’t go in (I am so strong in my resolve that, even if I had gone in, I swear I simply would have purchased a longer circular 2.75 cm needle for this project). And besides that, thanks to non-fiber life interfering, I missed seeing the Ravelry founders at the Knitting Nest! That was a real bummer, but family first, as they say.

But wait, have I gone on and on about the yarn I am using enough yet? I don’t think so. This yarn is a great choice for this pattern. No wonder people love it so—how versatile it is! Here’s the cardigan that Stephanie Pearl-McPhee made that got people all hepped up about it. Now, the wonderful Kauni has its issues. Kauni Effektgarn 8/2 is not the softest wool ever plucked from a sheep—which makes sense for a Shetland-style yarn. And there’s lots of grass and twigs in it, but, like I said about Sari Silk, at least it’s exotic grass from another continent (the yarn’s Danish). I really am enjoying watching it knit up, though. And there is so much yarn on the skein! What you see in the photo is about half a skein’s worth, maybe less. I have four skeins, so I’m sure I’ll have enough.

Wishing you holiday greetings, whatever holiday you happen to be celebrating, or have celebrated in the last few days. There are so many to choose from! I send Valentine Love to you all!

Thursday, February 12, 2009

Converging Rib Socks: How-to

This "sock recipe" assumes you are familiar with making a basic, top-down sock with a flapped heel: I won't be walking you through the heel or toe. You can make these socks with any needle configuration, though I’d find it easiest using Magic Loop or two circulars.

Cast on whatever multiple of 4 stitches will get you a sock width width you prefer, in whatever method you like to use for a good, stretchy cast on. I used 64 stitches and my usual loose knitted cast-on.

Knit the sock leg in K2, P2 ribbing until the leg is as long as you wish. Since I like to have my legs contain a multiple of the entire repeat pattern of any self-striping yarn I use, I did three repeats of the striping pattern in my yarn. This turned out to be a smidge over 6 inches or 15 cm, which is within my usual 6-8” (15-20 cm) sock length range.

Do the heel normally. After you have picked up all the stitches, knit a couple of rows with ribbing on the instep and stockinette on the rest. EXCEPT, if you want your converging ribs to go further down the sock, you can add two purls to the end of the sole stitches. This is what I did, and the rest of the pattern assumes you've added the two purls to what will eventually be the instep.

Next, for ease of knitting and counting, rearrange your stitches to where the sole has half the number you originally cast on (for me, 32 stitches) and the rest are all on the instep side. You will be gradually decreasing this side down until it matches the other half.

For the rest of the sock, the sole stitches just march along in stockinette. You’re not going to do a gusset.

Now you’re going to decrease the instep side by making the ribbing converge in the center. I didn’t center the ribbing, because I wanted each side to swoop in at a different rate. Call me asymmetrical!

DECREASE ROW: Knit the knits and purl the purls until you get two stitches before the center. You should be finished with a P2. Perform a centered double decrease as follows:

Slip the next two stitches TOGETHER as if to knit (both at the same time), K1, pass both slipped stitches over. Continue the instep, knitting the knits and purling the purls.

You’ll see a knit stitch sort of raised up. That’s the center. You’ll always do your decreases with a stitch above that one as the center. Finish the row.

Knit two rows in pattern (purling where you see purls).

Repeat this pattern, one decrease row followed by two no-decrease rows, making sure you do the double decrease by slipping the stitch two rows above your last decrease and the stitch before it, then knitting the stitch after your center, and passing the two over. You will have a nice line in the center.

When you have decreased to the point where your instep and sole stitch counts are the same, change the pattern.

INCREASE/DECREASE ROW: On the next “decrease” row, use a left lifted increase or MI (twisted, so as to not make a hole) between just before the first purl stitch, knit to center and do the double decrease, then do a right lifted increase or MI just after the last purl. This will keep your stitch count even.

Continue in this fashion until you have no more purl stitches. You will finish decreasing away the purls on the left side before the right (or vice versa if you didn't add the two additional purl stitches). That’s fine.

SINGLE DECREASE ROW: When there are no more purls on the left, only increase on the right and use K2tog in the center (or, if you didn't add the purls, do a SSK with the center stitch and the one following it and only increase on the left). Soon, all the ribbing will be gone!

You’ll have a fun pointed front to the sock. Finish as you would any other sock, starting the toe decreases after the sock covers your little toe. You can do any toe style you prefer.

Why do we decrease every third row rather than every other row, like you would on a standard sock gusset? It’s one of those things Cat Bordhi writes about in her “New Pathways” patterns with all the unique ways of increasing or decreasing for sock insteps. It just gets too tight along the instep if you decrease two stitches every other row. So, rather than knit a tourniquet, like I did the first time I tried this pattern, take it from me and decrease every third row. Instep comfort is also why I asked you to knit two rows with no decreases after the heel. If you have a high instep, consider starting the decreases later OR decrease every fourth row the first few times.

Other ideas: You could easily do this centered decreasing on socks with no ribbing. You’d still get cool curves. Or you could do K1 P1 ribbing. You might want to put an odd number of stitches on the instep, so your center stitch would be a continuation of the center K1 rib. If you have a high instep, consider starting the decreases later OR decrease every fourth row the first few times.

Let me know if you have questions. You can leave a comment on this blog post, or contact SunaSAK on Ravelry.

Saturday, February 7, 2009

I Am Suna, Hear Me Groan

Wow, my knitting luck is not good lately. What you see pictured it my first try at doing something fun with this pair of socks. I decided to do the gusset in the center rather than on the edges.

It looks OK here, but when I put it on, there was an absolutely atrocious ladder in the center. I'd done SSK, K2tog in the center, and the transitions didn't look nice.

So, I frogged the sock back to the heel and tried again. This time, I did a slip two together as if to knit, knit one, pass two slipped stitches over center decrease. That made a really cool looking vortex of converging ribs (in fact, I named the socks Converging Rib Socks) that didn't quite meet. I hope they look like arrows pointing inward or something. The curve on the edge was very pretty. I felt good. That is, I felt good until I tried the socks on. They were, um, more of tourniquets than socks. Tight as a blood pressure cuff. I was confused. How come socks are just fine when you decrease two stitches every other row (sorta) when making a heel gusset, but doing the same amount of decreasing in the center didn't work? What gives, I wondered.

Then a little voice played a tape in my head, which is what happens when I remember something I read. It told me, "Cat Bordhi says to decrease every third row on all her cool socks." Oh, um, yes, she does, doesn't she? I am thinking that perhaps she has a reason for that. Like trial and error showed her it gets too tight otherwise.


So, sighing deeply , perhaps even groaning, I ripped the socks back AGAIN (which also caused Pat at the LYS to gasp). This time I did the centered double decreases every third row. The curve was more gradual but you could see it happening. And when I got to 32 stitches, I tried on the socks. Yay, they went on my foot! They are still a bit on the snug side, but not bad. Whew. Now, by the time that I hit 32 stitches, I had not gotten rid of all the ribs, so I continued to decrease, but at the edge of the last P2 on each side, I'd do a lifted increase, to keep the same number of stitches on the needles. It looked pretty. I'd already experimented on which stitch to do the increase on (doing it on the purl made a hole), so I knew this would look OK.

Here's a picture of how it looks on my foot. I hope you can see the decreases. Tomorrow or the next day I hope to show you a completed sock in my weird little new pattern. I'll have to get someone to take a "front of foot" shot. I must say, all this thinking is probably not worth it, but I felt like trying something new, and that does usually take a few tries. This is not as depressing as knitting a simple cardigan back and having it end up 2" too small. That still makes me feel pretty dim.

I'll re-start Bridget this week, though. Not to worry. I won't give up like I seem to have done on my purple crocheted cardigan. The photo below is a side view. I realize you can't see the ribs at all, but it is interesting, I hope, to see that there's no gusset, but the sock decreases to where the foot fits fine!