Friday, September 28, 2007

Another Pair Off the Needles

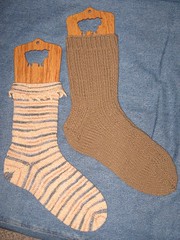
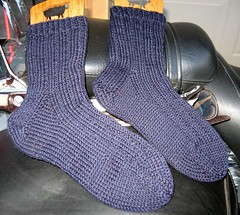
I'm glad I took my time with these socks, because I really enjoyed knitting them, especially the Seacoast Panda yarn, which is so nice and thin, with that lovely bamboo sheen. There are a couple of other pictures on my Flickr pages, so click the link under the picture to see how they look on feet. Walking Away Socks is a really nice pattern. I'll probably make the third variant eventually, too!

I started the Diamond Waffle pattern on Knitty in my Knitivity Redwood sock yarn. That is one complex set of instructions, dude. And why is there a full page photo of the socks? The detail is nice, but it ate all my printer ink. I think I should have looked over the instructions better before printing them out. But, they will look cool, if I can figure out all the various techniques.

Sweater Issues

So, I went home last night, finished these socks, then swatched the Kauni yarn to see if it would work with the Knitting Pure and Simple cardigan I am supposed to teach. The best I can get out of it is 6 stitched per inch, and the pattern wants 5. By the time I added in the stranded pattern, I'd really be changing the pattern like crazy if I tried to use that yarn. I do think I'd rather make a cardigan of the yarn, so I will either find another pattern or make up something.

In the meantime, I realized that Mr. Greenjeans, the next thing I want to make, IS a top-down cardigan pattern, and I already have the lovely Cascade 220 hand painted stuff to make it with! I can just use it to demonstrate techniques for the class--that will be fine! And at least I now know what yarns at the shop are appropriate for the pattern, so I can steer people to them. So, all is well. I don't have to buy yarn after all and can teach the class.

I did not neglect the surplice top yesterday. Both sleeves are complete and I am almost done with the edging around the collar/fronts (just two rows left--I got too sleepy to keep going). Next, whether I like it or not, will come the dreaded sewing in of sleeves and the less dreaded side seams. Then. whoa, I will be DONE! Imagine, a completed non-sock. I'll have something I made to wear to work other than Juliet! I am thinking I won't get to the sewing up until Sunday, when I can concentrate on it (tomorrow, yarn shop then a band contest in the evening). Perhaps I can sneak it in Saturday afternoon so it can block on Sunday.

I have some knitting books coming in the mail and some yarn (bad, bad yarn-buying Suna). I'll report on them and continue the teaching information later! Have a good weekend, readers!

Thursday, September 27, 2007

Teaching Knitting: Ending Your First Lesson


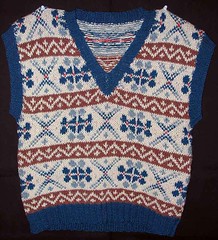
Fair Isle Style Vest
Originally uploaded by
sunasak
Prelude: Checking out Ravelry had me perusing some of the photos I have of older knitted items, and since I've been talking to people a lot about stranded and traditional knitting, I thought I would share this picture of a vest I did in the early 1980s (I know I made it when I was still in grad school). I made this with some wool yarn that I bought on cones at a yarn outlet in Columbus, Ohio. I got a LOT of this stuff, which is very scratchy--probably genuine Shetland--come to think of it, it's probably jumper weight, though it looks like I knit it up at a fairly large gauge. I remember scouring my fair isle patterns in Barbara Walker to see which ones to use, and how scared I was to cut the steeks I'd used on the arms and neck. Yep, other than the gauge this one is pretty traditional!

I don't have all the old things I made--many acrylic items pilled to death. But these wool stalwarts from the scratchy cone yarn are still here, waiting for me to visit somewhere cold!

And am I enjoying Ravelry? Why yes, I am (though I have been so BUSY with other things that I haven't used it as much as I wish). So far I have found it handy for looking up the actual names of yarns I have used, and to see other items made from patterns I have used. I could use more friends on there, so let me know if you are on, or find me if your number comes up! I am SunaSAK!

Last Words before Ending Class

Different beginning knitting classes have different lengths. I wish mine was a series, not just one two-hour class, but I teach what I am assigned, and am grateful for that! No matter how long, you want to be sure to mention a few things before sending the new knitters out of your nest of safety:

1. Show them how to change yarns. If they are making a scarf of a reasonable length, they will need to change yarns. And even if they are making a dish cloth or something smaller, it helps to tell them this early. Encourage them to avoid knots and show them a couple of options, such as:

a. Knitting with the old and new yarn for a few stitches then weaving the ends
in (works well except for color-changing yarns and some delicate ones where
this becomes too obvious).

b. Changing at the end of the row with a very loose knot and unknitting then weaving in later

c. Spit splicing if they are using wool and you are brave enough to show that.

d. The "Russian Join" if you know that. Just don't tell them TOO many options. They are probably already overwhelmed.


2. Show them how to bind off. I often get them to bind off a few stitches, then un-do those for them. It helps to have done it a couple of times. I refer them to web sites with instructions, so they can remind themselves.

3. Give them any handouts you have made, from places to get patterns to online instructions to help them if they forget.

4. Tell them they can come back for help at any time (if that is your store policy, for store-based teachers). It's in the shop's best interest: returnees tend to buy more yarn!

5. Ask them to do their best to knit at least for a little while every day until they are sure they have it all down pat. Say, "If you don't reinforce what you have learned, you may well forget, or have to come back to be reminded. If you knit every day for a week, knitting will be imprinted on your brain and you will always have the skill. Really."

6. And finally, remind them that knitting is supposed to be a fun and relaxing hobby, not frustrating work. Encourage them to come back for more help If they get frustrated.

Don't forget to thank them and let them know how to contact you later, too. You might get repeat business!

Next: purling and stitch patterns.

Tuesday, September 25, 2007

Ravelry Invite Came--Don't Let Me Get Too Sucked In

The above says it all.

I am SunaSAK on there. That's because I am sunasak on practically everything.

I haven't set anything up yet, but will later today.

If you aren't on, they appear to be moving really quickly now, so you'll be on soon. They are letting the huddled masses on now!

Monday, September 24, 2007

Knitting the First Row (and surplice progress)


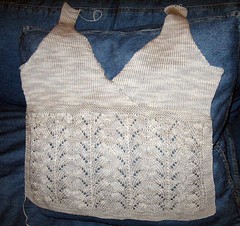
Surplice Top Front
Originally uploaded by sunasak

Finally, the new knitter will get to take a stitch today.

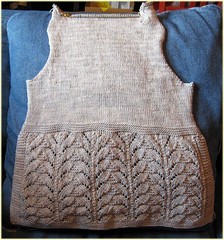
But first, I am relieved to say that the front of the Ecologie Cotton surplice top is done. I am so glad I made it all in one piece--it was very easy to pick up stitches in the back loops where the two sides overlap, and you can't see it at all from the front. It still looks a little wonky on the neck edges, but that's because there will be a nice border picked up on those edges once the front and back are sewn together.

I got a good start on the first sleeve, too, which just makes me dread sewing in the sleeves. I remind myself that I am much better at that now, so I will be positive! Holding the top up to me, I think it will fit very well. I sure hope so. It's many hours' worth of knitting!

Knitting the First Row

Once you have taught the knitted cast-on, it's easy to show students how to knit. You repeat to them that you stick the needle in, just like you did before, you wrap the yarn, just like you did before, you get a loop on the right needle, just like you did before... BUT instead of putting the loop back on the left needle, you leave it on the right and slide the original stitch you poked into OFF the left needle.

I demonstrate it slowly, but smoothly a couple of times, with them watching only, then I assure them that it won't look that smooth the first time or two for them, and that their fingers might need to help them a bit. I point out how much easier it is if you work close to, but not at, the ends of the needles.

Next, I let them try, and go to each person individually to watch and assist. Again, I try to watch the person who seems to have the most trouble first. It encourages the others to hear me say, "Yes, you did it!" to that person. Even if someone seems to have caught on, watch him or her knit a few stitches, in case the technique is off (wrapping the wrong way or something).

Things to watch for:

1. Stretching the knitting out. Some people pull hard on the knitting and get their needles very far apart. This stretches out their stitches and makes it hard to slide the stitches off, too. Show them how to work in closer. I have seen MANY light bulbs go off in people's heads when I encourage them to not pull so much.

2. Finishing the stitch on the point of the needle. This can cause the student to lose stitches easily, and also invariably leads to tight knitting. Show the student how to finish the stitch on the shank of the needle (the widest part) so that the stitch forms around that part. Stitches will slide more easily and be easier to knit into on the next row.

3. Not doing the steps in order. This mostly happens with very young students, but can happen to anyone. Often "sliding off" gets omitted, but sometimes they will wrap twice, too. You can repeat the steps however you like to, to help them remember. I usually say, "In, wrap, poke, off." Or something like that.

4. Yanking the yarn very tight at the end of each stitch. This will lead to tight knitting too. Some people don't need to snug up the yarn at all, while others need to give just a little tug to get nice, medium knitting.

5. Not tightening the yarn at all. You will sometimes find people creating very loose stitches (especially the pullers in #1). Tell them they get to snug up their yarn a bit.

Leave them alone to bond with their knitting, but ask that they let you know when one row is done.

After Row 1

When each student finishes the first row, take a look at it. Turn it to the back and show them how there is a nice line of bumps with a loop coming out of them across the back. If there is a mistake, show them how they can tell there is one--there will be something different in there--a spot with two loops coming out of one bump, or a loop with no bump, or a sideways loop (that's an extra YO).

If there is a mistake, tell them you'll help them fix it when they get to that stitch on the next row. If there are no mistakes, be very happy and congratulate them on a row of perfect knitting. Wow, they are great!!

Row 2

Don't let them start row 2 without this vital demo: avoiding the dreaded ever-widening scarf. This will lead to a lifetime of happy knitting!

Show each student how to position the yarn to knit a new row. Pull the yarn down and behind the knitting, and show them how they can see the bump from each previous stitch on their needles, including the last one.

Then pull the yarn over the needle, and show how you can create what appears to be TWO stitches from that last stitch by doing this. Say if you take that last stitch and make it two, your item will get wider and wider as you knit. Most people will nod their heads, having seen scarves that got wider and wider made by other new knitters. Tell them that by carefully pulling the yarn down before each new row, this will never happen to them. And remind them they can count the stitches in each row to be sure they haven't added any--it's a good idea at first.

If there are mistakes in the first row, show the students how to avoid the kind of mistake they make (each person usually messes up in one or two ways, at most). You can also show them how to fix their own mistakes, though they won't probably be able to do it at first.

Cheer them up by pointing out that almost every "mistake" they make is something they will later do on purpose as a "technique." Tell them they are making "garter stitch" and that it is knitting every row. When they are all involved in knitting, you can explain the properties of garter stitch and why it is good (lies flat, is stretchy, makes variegated yarn look more broken up).

What to look for in mistakes:

1. An extra wrap. Some people tend to get confused and wrap their yarn between stitches. This of course is a yarn over, and a good thing, just not in a garter stitch project. It is easy to spot an extra wrap because it will look slanted on the needle. A properly formed stitch stands up straight. How to fix: the easiest way to fix these is to just drop the wrap, and snug up the surrounding stitches, which will be rather loose.

2. Knitting into the stitch below. Sometimes the needle goes too far under and the student knits into the stitch below the right one. This would make lovely fisherman's rib, but will bunch up their knitting. You can spot this when you see two loops rather than one in the bump for a stitch. To fix: drop the stitch and re-knit it as two. In garter stitch this isn't particularly elegant, but show them how, for later use.

3. Knitting between stitches. Sometimes the student will "miss" the loop and knit between two stitches. They will end up slipping a stich to the right needle, with a YO attached. To fix, let the YO fall and it will look like a dropped stitch. Repair as for a dropped stitch.

4. Dropped stitches. Remind them to NOT pull if they drop a stitch, so that the loops don't unravel farther. Then show them how to fix the dropped stitch. If nothing has fallen out, they can just put the stitch back on the left needle and proceed!

5. Loose first stitch. A lot of new knitters totally panic when they see the first stitch of a row come out very loose. Reassure them that it is not uncommon nor the end of the world. Remind them to knit the first and last stitches snugly and to not pull when doing the first stitch on a row.

6. Forgetting to slide the yarn off the left needle. It's easy to spot this one--your student won't be able to move the needles. Explain to them that you need to remember that final step--sliding the yarn off the left needle, and remind them to not stop in mid-stitch (that is how this often happens). Fix the problem for them--they won't do this often once they get the hang of making a stitch.

If other kinds of mistakes happen that you can't figure out, you may need to demonstrate tinking. (Un-knitting.) I prefer to show students how to tink one stitch at a time, by sticking the right needle into the stitch below and then pulling the yarn out to remove the stitch. This puts the yarn back on with the right orientation. Unraveling is fast, but putting the yarn back on the needles takes time, and it's hard to remember how to put them on "facing " the right way.

Let the students knit a while. They will be working to smooth out their technique and to see what kinds of errors (if any) they tend to make.

Your job is to not blanche if students knit "funny." Just observe. You see a lot of interesting ways of holding needles and yarn. If what they do produces a nice, even knit stitch, let them be. There is more than one "right" way to knit. And if someone really, really wants to hold the yarn in their left hand, show them continental knitting. I do have an occasional student, however, who likes to "throw" but with the left hand. Some get quite good at it!

Some new knitters put a lot of extra motion in to knitting. Most will smooth out and become more econimical with time. Ask them to watch each other and you to see different ideas for knitting. The first day is a good time to try different ways of holding the needles and yarn, before you are "set in your ways."

While they are knitting is a good time to mention some handy hints and information:

  • Learn to relax the hands and arms while knitting will prevent carpal tunnel and is a good thing. Tell them they can expect to relax once they get the hang of it.
  • They are making garter stitch, which is knit (or purl) every row. This stitch is very useful for making scarves or other items that need to be flat. Explain the wonders of garter stitch.
  • Don't stop in the middle of a stitch (see #6 in mistakes). You can easily forget where you are and knit an extra stitch. Always complete a stitch before chatting, answering the phone, etc.
  • Don't end your knitting session in the middle of a row. This will keep from stretching our your knitting in the middle. If you must put down your knitting because the phone rings, a child screams, or whatever, remember how to start again: the yarn should hang from the back on your RIGHT needle. And remember, the last stitch you knit is always the one with the yarn hanging off it.
  • If you pick up to knit and start with the yarn on your LEFT needle, you will make a short row, which is a "technique" but not what you want to do. You will end up with more rows on one side of your project than the other, plus a hole where you turned around. Unknit until you get back to where you started, move the needles to the correct position (yarn is hanging from RIGHT needle, and start again!
    IDEA: I sometimes do a drill and say briskly, "RING RING" in the middle of their quiet knitting time. I tell them to put down the knitting right now and pick up their phones! Then I say to pick the knitting back up and figure out how to start again. It's a good reminder and somewhat fun.


Note: I think some of my explanations above may be clear as mud. Let me know if you have a more elegant way to describe the errors or to fix them. And let me know if I forget a common mistake!

Next: What to say before the first class ends (if you aren't teaching purl)

Friday, September 21, 2007

Refresh My Memory...


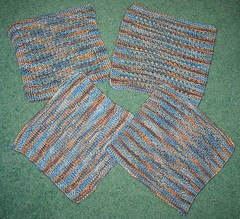
Dishcloths for my sister
Originally uploaded by sunasak
Since neither project I am currently working on looks any different from a picture I already posted (that would be the beginning of my second green Walking Away Sock and the front of the surplice top, which has all the lace panel and about 1/3 of the first surplice done), I am sharing the only photo I can find of something that passes for a beginning knitting project: the dishcloths I made my sister for Christmas last year.

OK, so I made them from Schaeffer cotton yarn that retails at nearly $40 a skein, so they aren't beginner Sugar-n-Cream models, but they are simple knit-and-purl patterns. Loved the yarn, by the way. Made very sturdy cloths with a bit of sheen. All I can remember is that I had so much going on (sudden pick up in love life, for one) that it took me way longer to make 4 discloths than I had hoped--the Flickr site reveals I took this photo on December 25, so I must have not finished until the day I gave them away! I have leftover yarn enough for another, too, which would make the expensive skein actually crank out $4 dishcloths after all.

But, here is my dorky question. I got to yet another set of instructions (in the Nashua pattern book for the surplice top) telling me to decrease X number of stitches "evenly spaced" across the row. WHY can't they say "decrease every X stitches" so you'd know how often to decrease? Why do we have to figure that out for ourselves? And, have I forgotten the "magic" way to calculate this (I am just sure I read such a thing once). I know that if you decrease once on each end, that takes care of two of them. But what's the formula for figuring out how many stitches to put between each decrease?

Or, do they say this mainly because you have to do is somewhat irregularly? On mine if I knit the first two together and then K5, K2tog to the end, I came out with two few decreases. I ended up doing them on the next row, hoping the Knitting Police would not come by and see. I must have done that on the other side, too, but it was in June, so I forgot.

I am feeling a bit dim, but willing to learn (not willing enough to post this question to an email list, though).

I have a LOT of knitting time tonight and over the weekend, so I am hoping to make good surplice and sock progress. And I am working on the next beginning knitting teaching tips, too!


UPDATE: Woo! Post and you shall receive! The kind and gracious Katie K has posted in the comments this helpful link to a calculator that will answer my questions (and yours, if you also wonder how to calculate decreases). Thanks to the Knitting Fiend for making this calculation helper, too. I just love the blogosphere and its helpful residents.

Thursday, September 20, 2007

Teaching the Cast On

Welcome to the next in my series of posts on teaching beginning knitting. Previous posts are in the sidebar, or you can find them by searching for "teaching ideas." Eventually, I'll put them all together.

Now we are finally into teaching new knitters how to DO something! Here are my tips for teaching the knitted cast on. Your mileage may vary, yadda yadda.

But Wait!

Before we get moving set some expectations. Ask how many in the class learned to knit years ago but think they have forgotten. Ask how many know how to crochet. Ask how many are between the ages of 12 and 17. Tell the class not to be surprised if these students seem to pick things up more quickly and not to be discouraged by that. Many times the knitting skill comes right back to people who think they have forgotten how. Crocheters are used to manipulating needles and yarn, so they often pick up knitting quickly. And for some reason, the teenage brain is hard-wired for knitting acquisition and many teens just take off with very little instruction (I have had to slow some down, because they start going so fast they get sloppy).

Gently remind people with known issues (tremors, bad arthritis, brain injuries, known small motor skill issues) that they might take longer to get the hang of knitting. But, that is just fine. Knitting is not a race. It is a life-long avocation, so it is not really important how long it takes to learn--it's just great to learn. And knitting is often great therapy if you do have an issue with your hands or coordination.

I usually point out cheerfully that I have never failed to get someone knitting, which is the truth. (I do think there may be one or two who didn't keep it up, but they did at least make some stitches.)


Demo Equipment

A word about the equipment you use to teach. I like to use size 19 needles (I use Bryspun because they have some "grip") and super bulky yarn. We have used the same ball of pink "Big Baby" Acrylic for over a year at the yarn shop, and it's taught both knitting and crochet! I also use it as an example of how some acrylic doesn't feel all that pleasant to the touch.

OK, Now the Slip Knot

First ya gotta do a slip knot. I am always surprised at how few people know how to do this. I find it easiest in a group setting to teach this like you would for a small child.

1. Lay your yarn on the table and make a loop with the free end on top. Have just a few inches of yarn before the loop.
2. Take the yarn end that is attached to the skein or ball and push a loop of it through the loop on the table.
3. Grasp what you pushed through in one hand and the free end in the other hand and gently pull.
4. You will have a knot that will slide up and down the end attached to the skein.
5. Place this loop on a knitting needle and gently tighten.

Here is where I then explain how you want the loop to be loose enough to slide up and down the needle easily, but tight enough that you don't see a lot of "daylight" around the loop. I sat that is the tension you will aim for in all your knitting.

Notes on the Cast-On

Next you will show the students how to cast on. I usually don't tell them it is called the knitted cast-on at first--I let that be a happy surprise when they later realize they already know most of the steps to knitting. I point out that all knitting consists of is loops building upon loops. In order to start, you need more than that one pitiful slip knot as loops. That's why you cast on--you need that first set of loops.

1. First I slowly demonstrate a cast on stitch. I position myself where everyone can see my hands and the yarn. I ask them to set their needles down and watch, because I've found that if they hold their needles, they try to follow along, which of course means they look at their needles, not mine, and miss something. I let them follow on the second or third demo.

2. I stick the right needle in the slip knot and say remember this direction. You are poking it UP and sticking the new needle BEHIND the one with the knot. You will do this over and over.

3. When I wrap, I point out the yarn is going left to right, and that I try to "snug" the yarn between the two needles, because that makes the next step easier.

4. I admit that poking the yarn through the loop already on the needle is the biggest challenge. I tell them that they need to feel free to use their fingers to move the needles and hold the yarn in place. I demo that my index finger helps me move the right needle into position to move the yarn through the loop. I also reassure them there is more than one way to accomplish this maneuver, and that their fingers are more than welcome to help at first.

5. I tell them to pull the new loop toward their chest, to make a nice big loop to put back on the right needle. (If they ask if they should twist it or not, tell them it works either way, just be consistent.) Then I say later they won't need to pull so much yarn out. I stress that when you put the new loop on the right needle, you need to "snug" it, not "tighten" it, because you want to make it easy to get the needle back in for the next stitch.

As I demonstrate, I make sure to show them each step clearly as well as to articulate it, giving whatever mnemonics seem to help. This addresses people who learn best by seeing and those who learn best by hearing. I address the people who learn by doing in step 6. That hits most of the standard learning styles, giving everyone a chance. I also have the information written down in handouts, for people who like to read instructions.

Hint: a question that usually comes up is, "Why is the last loop I put on sideways? It looks different!" You can explain that in this cast on, the newest loop always slants, but straightens right up when you put a new loop on. It's normal.

6. After showing them a couple of times, I look around at the panicked expressions and say I will now help each of them get started. Then they look relieved. Those who "get it" are encouraged to go ahead and put X number of stitches on, or to help their neighbor--I explain that one really good way to learn something well is to teach someone else. Then I go around the group. I try to start with the most frightened looking student. I figure if they get going, everyone else will feel better. I usually only have to help for 3-4 stitches and they get it. If not, I move on and come back.

Hint: You will have people who don't care what their cast-on stitches look like, and others who get upset if they have a slightly bigger loop in one spot or another. For the second bunch, encourage them to start again as many times as they like. They'll remember better later. For the others, if they decide their cast on looks icky after they've knitted a few rows, extol the virtues of fringe on a scarf. It hides that.

OK, until I think of something I have missed, that's it for teaching the cast on. Next: we let them knit something.

Wednesday, September 19, 2007

Lucy Bag for Crochet


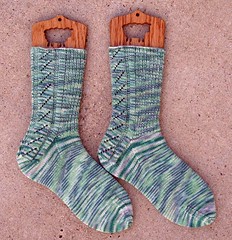
I was asked on a non-knitting email list if it was possible to crochet a Lucy Bag, since there are members of the list who simply don't want to learn to knit (picture is a sample of one I knitted). Also one of them has great difficulty with commercial instructions, so they wanted it "conversation style." Here is what I came up with. If you spot any obvious flaws, let me know. These are more "guidelines" than instructions, but might be useful to someone!

Lucy Bag for Crochet

Using 100% NON superwash wool, crochet a flat circle that is 1/3 larger than the ultimate diameter you want. I'd probably double the yarn and use like an I hook, double or maybe half double crochet. You want there to be spaces so that the felting happens better. It will look loose.

After you hit the diameter, stop increasing and just crochet along with the same number of needles. The sides will start forming. Make it 1/3 longer than you want in the end.

For the handles, I'd eyeball them. Pick up about 15 or so stitches at one point and make a rectangle 10 inches long. Attach the second end of it about two-three inches away from the first, making a fairly short loop. Then on the other end of the bag, sort of parallel, pick up the same number and crochet a 40-inch rectangle (these are the lengths from the knitting pattern). Attach that one a few inches from the first. Viewing a clock face as your circular bag, the attachments would be like at 11 and 1 on the clock and at 5 and 7 on the clock.

Felt the bag by washing in very hot water in a top-loading machine, highest possible agitation. You may need to run it through more than one cycle. To reduce lint, you might want to put the article in a pillowcase, securely fastened, but that makes it harder to check how felted the bag is.

To fasten, the long loop passes through the shorter one, then you can wear it on your shoulder.

The above is not based on actually crocheting one of these. Just an educated guess.

Copyright 2007 by Sue Ann Kendall. Thanks to Jodie Lucas for input.

And if you knit, buy a copy of the Lucy Bag pattern. It's by Two Old Bags and can be found many places on the Internet.

Tuesday, September 18, 2007

What Cast -On to Teach, and New Yarn


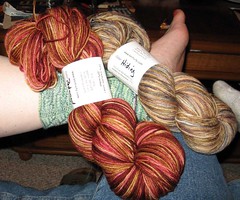
New Knitivity Yarn
Originally uploaded by sunasak
Today we'll start to talk about teaching new knitters to cast on. But first, enjoy my new sock yarn. Perhaps they aren't the most splashy, but they have much subtle beauty. Both are from Knitivity.com, hand dyed in Houston, Texas (which meant I paid sales tax, which I would only do if I really liked something).

The one onf the right is "Hiding" and is supposed to be desert camoflage coloring, but I see the river rocks where the river meets the sea in Ireland, with the tans, grays whites and bits of black. The other is "Redwood," and is supposed to look like, well, redwood. It does, but when I saw it, it was much more "red" than I thought it would be from the website. And there is more gold than brown. This is all most excellent to me. The colors remind me of the warmth of the media room we just decorated in our house--the walls are a deep red and a dark gold.

I'd love to see either of these in worsted weight (I will tell Ray, I promise). An afghan with the Redwood and a denim color would perfectly coordinate with my media room, and I can see that Greenjeans cardigan I want to make so badly in the Hiding colorway--it would go with any neutral.

So, Which Cast-On to Teach?

Hey, you! Your feedback is most welcome here--I'd love more ideas to incorporate, so do not hesitate to suggest additions in the comments, or give me your opinions. I'd love them!

Some people don't teach new knitters to cast on. They cast on for them, and often they knit the first row for them.

If I were using the backward loop cast-on I'd probably do the same. It is so hard to knit the first row after backward-loop, and I usually knit into the back of the stitches on that row, too, so that would confuse a new knitter.

But, I don't use the backward loop cast-on. Why?

1. It's hard to knit the first row.
2. It is very hard to cast on loosely enough to not affect the finished product.
3. I don't like the way the edge looks very much.
4. it doesn't build the new knitter's confidence.

Some people like to teach one of the long-tailed cast-ons. Now, this is the one I use most for myself, but I don't teach it first. Why?

1. Guessing how much yarn to reserve intimidates new knitters.
2. It LOOKS so complicated (though later I will share my "easier" way of doing it).
3. It is also pretty easy to do tightly, though easier to get a good gauge than backwards loop.

I like to teach a knitted cast-on (that's what I call it, anyway). Why?

1. It starts them right off using the needles.
2. It is fairly easy to get a loose gauge.
3. Most important: it's a lot like actual knitting! Once they get how to do this, they are almost knitting already--it builds success.

Next: teaching the knitted cast on (I am out of time today, sorry).

Monday, September 17, 2007

Sockilicious Knitting Weekend

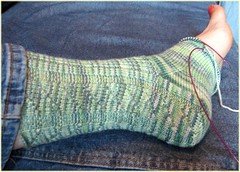
I got more done on the Silver Leaf Reflections Walking Away Sock (what a mouthful) over the weekend, since I was away from home a lot and couldn't work on my bigger project. This sock looks teeny tiny when it isn't on a foot, since the whole front is ribbing and the back has ribs, too. But as you can see it fills out nicely.

I am loving the color of this Seacoast Panda yarn, and as always I love bamboo in sock yarn. Feels light as feather when it's on and is thin enough I will be able to wear it with nicer open-back shoes than my extra casual Birkenstocks and clogs. My previous pair is in sport weight wool, so it's thicker.

I enjoyed helping a lot more people at the yarn shop on Saturday, even if none of last week's students returned (one did call, though). I got to teach 3-needle bind off and got a nice teen girl going on a scarf. Plenty of knitting also occurred at a high school football game, waiting at a restaurant, watching football on TV and during an extra-long church service, the highlight of which was my son playing tuba.

I'll be posting more beginning knitting teaching tips later in the week so stay tuned.

Surplice Top Progress Report


Surplice Top Back
Originally uploaded by sunasak

Regular readers probably remember me promising to get back to this project, the Surplice Lace Top, from Nashua Handknits American Designer Collection, in Natural Focus Ecologie Cotton, logwood colorway. I started it in June then went on a sock binge.

This week I finally managed to get the back complete. I don't get much of a thrill out of long stretches of stockinette--feels like it will never end. But the way this natural dye makes mottled effects certainly makes the tedium worthwhile. Thank goodness for football games! As of last night, I am well into the third repeat of the lace panel for the front.

I am glad I found encouragement for knitting the back and front each in one piece, rather than attaching the lace panel later. It looks just fine.

Of course, I messed up and had some challenges--that's the way knitting goes! I think I used the smaller needle rather than the larger one on the top, but the size is only off a quarter inch. Then I tried to use one of my new KnitPick harmony needles on the second lace pattern, but my size 4 set has one defective needle--it won't screw all the way in. Grr. Now I will have to test them all to be sure they work and return the ones that don't work.

I must say the new Kntipicks needles are pretty. They are quite slick compared to bamboo, but not so much as their metal needles. I am questioning my decision to get the smallest sizes in 16-inch models, thinking I'd use them on little projects. They still give my hand a cramp. Wah. I will order 32-inchers too.

I know I will really enjoy wearing this, so I will work hard to finish it. My other motivation is that I bought enough of my favorite Cascade 220 hand-dyed for making that beautiful little cabled one-button cardigan Greenjeans from the new Knitty (see previous post). It has jumped to the front of the queue, because I both love the pattern AND the black/red Cascade yarn that looks like dying embers.

Friday, September 14, 2007

Color Meme and Knitty Review

First, yay, I finished the Disco Colori socks. You can see their lovely matching heels and the large amount of leftover yarn in this picture. I think I will make my sister wrist warmers out of the leftover, even if they aren't often worn by the over-60 set (much older sister, hee hee). The sparkling silver will make them sort of jewelry-like.


Color Meme


This color meme came from a blog by Kristi. I think it's interesting, so here are my answers.

1. What is your current favorite color? Violet

2. Had your favorite color changed over the years? No, it's been purple most of my life.

3. Is your current favorite color one that is currently trendy? (Do you see it in the fashion rags or on the clothes rack or in the linen aisle right now? How about 5 years ago?) I just bought a shirt in my exact favorite shade, which is a good sign. I see lots of purple linens, so I think it's still in fashion. The apricot and mint scheme I loved in the 80s for home decor is gone, though.

4. What is your favorite color combination? Black and red (wear) or purple and green (look at)

5. Is that combination a popular one? (Is it use in prints you see in the stores and catalogs and magazines now? How about 5 years ago?) There tends to always be black and red stuff to wear, and for the last few years there has been a lot of purple and green home decor stuff. We just got a lot of new items for the guest room in that combo, and painted the walls subtle versions of them.

6. What is your favorite way of using color in your knitting? (Are you a stranded knitter? Do you prefer simple stripes? Do you prefer just accents at the hems/collars?) I like to knit things that subtly change color, or are all mottled. I like stripes, but other than on socks they aren't my best look. I like slip stitch patterns and stranded items a lot. The combo of black with a variegated yarn always looks neat to me.

7. What colors look good on you? In my "normal" hair I look good in deep versions of colors like red, black, dark purple, and blue. Things with more of a bluish tinge. With my colored hair, I can wear a lot more stuff with more orange.

8. What colors look bad on you? Tan that is close to my skin color, pure white, greenish yellow, mauve (muddy colors), lilac (which is too bad because I like the color).

9. Do you wear colors that don’t look good on you just because you like them? For a long time I kept buying lilac yarn and knitting with it, only to see that it didn't look good on me. Same with tan. I did stop doing that. Sometimes I wear a color that doesn't look good on me, though. It's not the end of the world. I am not a supermodel.

10. What is your favorite neutral color? black

11. Is there a sweater pattern that uses more than one color that you’d like to make, but you wish to change the colors from what is published? If yes, which one? Whoa, I rarely make anything in the color it is published in. Lots of sweaters show up in colors no one should wear!! The fact that I am knitting my current top in the color in the picture shocks me--but it's the colorway that looked best on me! I am pretty confident in my ability to pick a good color for a garment. And my LYS friends will let me know if I stray.

Knitty Review

Time for another Knitty review! Overall it's a dandy issue, though whoever coded the apostrophes might want to check out their HTML. I may add to this as I get time, but here are my first reactions to the patterns in the Fall 2007 Knitty, listed in order of what I'd most like to knit:


  1. Mr. Greenjeans: this is already printed out and I am hoping the LYS has the yarn the designer used. If not, I already have ideas for options. This has everything I like. One piece construction, cables, raglans, wearability at work. Woo.
  2. Diamond Waffle: OMG, what a cool sock!!! It has all sorts of interesting construction details--the gusset, the toe, the main pattern! I just flew over to Knitivity and ordered Ray's new Redwood colorway to make it in. Maybe for a dude. Maybe for me.

  3. Back to Basics: I like the interesting techniques in this one as well, especially the way the ribbing starts, and bet it will show up on my needles at some point.

  4. Muir: Well, I like Muir Woods, and I like lace. It's a bit "holey" but looks like it would be fun. It's on my long list of lace things to make, fer sure.

  5. Totally Autumn: on this one I liked the photo with the feet sticking out, and loved the pattern, though I think the yarn colorway detracted a bit (yarn looks great to touch, though). That said, I'd probably pick a yarn like that, too, 'cause that's what I like to buy. But, well, I am trying to be mature and realize that not all variegated yarns go with all laces. (I am sure many folks think my pink/gray/white lace shawl was a bit much, so I am not claiming I am such a great lace yarn picker.


OK, there are a couple of patterns I probably would not ever make but I have comments on:


  1. Flower Power: the model is the cutest baby! Click the link just to see that precious face!

  2. Q: that is a really interesting sock done in a very interesting technique. But it's too busy, complicated or something for me. I will enjoy seeing other people wear it, though!

  3. Cinderella: again, a great idea that will make all those people who don't like circular knitting but want to make socks very happy. But, I don't really like the way it looks, and I am not sure why. Perhaps the yarn is too thick?
I sure am glad that Amy Singer came up with this online magazine and has kept it going. Much sympathy to her with the gall bladder issue. Been there, hated that. And thanks to all who submit patterns. It's so fun to see what folks out there are up to!


And last, here is a sneak peak of my next sock! Seacoast Panda wool/bamboo sock yarn in Silver Leaf. Walking Away Socks, by Joanne Clark, Reflections version. It's a Fiber Trends pattern, so you can get it wherever those are sold.


Wednesday, September 12, 2007

Excessories! and Before You Teach...


More Sock Yarn
Originally uploaded by sunasak

I made myself laugh just now by commiserating with someone in an email message about having "too much" sock yarn. I said that now my yarn consists decorative accessories in lovely baskets, some of which may be socks some day. Only when I first typed it, I said "excessories" instead of "accessories." What an EXCELLENT mental slip, if I do say so myself!!

So, here we have a photo of some of my excessories in a lovely basket.

Before You Teach

Now for the second part in my series on teaching beginners to knit. Today I'll focus on things to talk a bit about before casting on the first stitch. (This information is also useful to fill time waiting for a latecomer, or for someone to pick out their yarn.)

Now, this IS important stuff, so if someone misses it, it's good to slip some more of this info in during the class or series of classes.

I like to talk in general about the ingredients of knitting, because I have found that if I don't talk about this stuff, I'll get asked about it anyway! You can do the topics in just about any order.

Needles

Types: show them single pointed, double pointed and circular needles, plus a cable needle if one is handy. Let them know that circulars are probably the most versatile, but that most people end up using all of these for different projects. Explain why they are using the shorter single pointed needles (if that's what they have). Mention that some "throwers" like longer needles, because they can rest one in their lap or under their arm. Promise to demo that later.

Materials: reassure them that all materials are appropriate in different circumstances, and that individuals will have different preferences. Talk about wood (bamboo, ebony, birch), plastic (Bryspun, clear, old solid ones, light-up), metal (steel, coated, brass) and the importance of smooth joins and flexible cables in circular needles.

How to Choose: Point out that slippery yarn often benefits from needles with a bit of texture, while smooth yarn knits really quickly on slicker metal needles.

Yarn

I could talk about this for a long time so I try to be brief!

Content: point to the wool, bamboo, cashmere, mohair, cotton, hemp, corn, soy....and say that it didn't use to be like this! I act like an old lady and reminisce about long ago only being able to get acrylic in mod 70s colors.

Textures: Emphasize that they are knitting with smooth yarn, but that there are all kinds of weights and textures and constructions to choose from. Point to the eyelash, the thick-and-thin, the sock yarn, the laceweight and so on.

Quality: go into detail about how good yarn may cost more, but in most cases is worth it. Tell them when a cheap yarn may be fine. Remind them that they will be touching the yarn for many hours, so be sure you like how it feels.

The Label: show them all the brilliant information there is on a yarn ball. Have each person look at the label from their yarn. Have them see if they are using an appropriate needle for their yarn. If not...switch. Tell them you are guessing, since they don't yet know if they are tight, loose or average knitters. This will lead you to...

Gauge

Give them their very first little chat about gauge and why it matters. No doubt it won't be their last. Let them know that every knitter is different, and that's why you can't say that Yarn X should always be knit with Needle Y. (If I personally did that, I'd have many overly large items.)

Where to Buy Yarn

The Local Yarn Shop: If you are in a yarn shop, extol the virtues of the yarn shop up and down. Well, it is TRUE. The LYS is a wonderful thing. Remind them of the friendly helpful staff, the wonderful classes, the ability to see, touch and smell yarn before buying (hey, Schaeffer yarn smells like vinegar, ya know). Mention that you can see many patterns knitted up, and browse patterns easily at the LYS. Remind them that the shop is there to hang around in, if that is true. Point out the wonderful friends you can make there (hug one, if available). If there are other yarn shops in town, let students know it is not a sin to shop there. Usually there are things in one place that aren't in another. And you may be more comfortable with the staff in one place than in another--there are a lot of factors that go into choosing your favorite!

The Internet: Do not deny the lure of the Internet. When the LYS doesn't have enough of the yarn you want, or you can't find something locally, the Internet is your friend! And there are many indie yarn dyers and other vendors whose merchandise is not available in a shop. Mention your personal friends by name, hee hee. Reveal that there are FREE patterns on the Internet! And caution that you sometimes get what you pay for, too! You might want to let them know there is good refresher information out there if they forget something you teach them, and that there are many cool books they can order via the Internet, to expand their knowledge.

Big Box/Discount/Hobby Stores: Be nice, and remember some of your students may simply not have the funds to buy $37.50 dishcloth yarn like YOU did. Just caution that some of the yarn in discount stores and the like may not be of great quality, which may lead to a disappointing product, but that some of the places have much improved selections, and you can't go wrong if you are looking for crochet cotton or dishcloth cotton. Even yarn shop employees get some of their stuff there! If you are careful, you will help the students with limited funds feel better, yet give them the idea that it might be worth their while to get less yarn of better quality than tons of inexpensive stuff.

I try to fit all this information into ten minutes. Good luck with that. The part on where to buy yarn can also be interspersed with your other instruction, and makes good "chatting" fodder while they are knitting away and you are hoping they mess up so you can help them learn how to not make that mistake again.

Have fun!

Tuesday, September 11, 2007

Teaching Knitting: Getting Started

(First let me say how hard it was to find a picture of something simple that I had knitted! This is the hat pattern I hope to teach ladies next Saturday, if they show up and still want to knit a hat. Of course, they won't be making it in kettle dyed Malabrigo wonderfulness!)

So, as I was saying yesterday, I really enjoy teaching knitting. People keep saying they are impressed at how much I know about beginning knitters, and my reply is that it's just a matter of observing them--I am sure there are many, many instructors out there with similar hard-won knowledge, and I am glad they exist. It's a lot easier to embark on a lifetime passion for knitting if you have a teacher who helps you avoid certain pitfalls and learn to correct mistakes easily and simply, right from the start. I am sure I am not the best beginning knitting teacher in the world, but I seem to be pretty good at getting folks started!

So, I thought I'd add a series of occasional posts here in the blog with some tips as to what works for me, in case you ever get the chance to start a newbie on the road to knitting addiction and want to ensure they are successful. It's important to note that the way I do it is NOT the only way to do it, nor necessarily the "best," but it works for me. All teaching ideas posts will come with the label "teaching ideas" so you can search for them easily.

Equipment

Before getting your student started, be sure that he or she has good starter knitting equipment. Here are options that work for me:

  1. Needle material: either bamboo or high-quality plastic (I like the Bryspun needles with the extra pointy tips that make the first pokes through the stitches easier. I like bamboo because it feels good for tactile learners and is not slippery.)
  2. Needle length: usually shorter ones. They are less awkward to hold, which is especially good for younger knitters.
  3. Needle size: appropriate for the yarn chosen. I know a lot of people use large needles, but it's hard to see stitch definition if the fabric is really loose and lacy, and I've seen students very disappointed in how their output looks if the yarn is too thin for the needles.
  4. Yarn type: wool or cotton that is smooth and does not easily come apart. You need smooth so that the new student can learn to identify what a good stitch looks like, and you need something tightly spun or solid, to reduce the frustration from splitting the yarn. Sometimes you will need to compromise on this, of course. Wool is my favorite, because it has bounce and is a bit more forgiving of uneven stitches. However, many people like to start making dishcloths, which aren't really "wool" items. A nice quality cotton is fine for dishcloths. I find Sugar and Cream splits a bit, but hey, that works, and is a bargain.
  5. Yarn size: generally worsted to bulky weight. Super bulky is too hard to manipulate (though I demo on it, so folks can see what I am doing). And thinner yarn works, but doesn't show much progress--new knitters need to be able to see that they've accomplished something fairly quickly, to maintain interest.
  6. Yarn color: this is up to the student, but I have found that self-striping, pooling or otherwise variegated yarn is useful for a couple of reasons. For one, having the yarn you are knitting with a different color from the yarn you are knitting into lets you see what you are doing more easily. Also it can be easier to count rows if the color changes. And for those who are discouraged easily, striped yarns provide encouragement. You can see you've done two or three colors. Or you can knit hard, hoping for the pink section to show up. Knitting five feet of a tan garter stitch scarf could bore anyone, even an eager knitter who really wants a tan scarf. I've had a lot of success with young people on yarns that slowly change color. They are fun.
  7. Pattern: it's nice to have whatever you are teaching written in a very simple pattern. It will get folks scared of patterns a chance to break one down into its components and learn that it is their friend.

What Not to Choose

There are some choices that make teaching more difficult:

  1. Shiny aluminum needles: these are slippery, are often a bit too long, and make irritating noises. People often proudly bring them in to learn on. Often they buy bamboo before they leave, when they see that the other students are having more success that way. Of course, if a student feels they can't afford new needles, they CAN learn on shiny aluminum!
  2. Poorly made acrylic yarn: I am not 100% anti acrylic--I liked that Sirdar Toddler Aran I knit with last week, for example. But, the worsted weight stuff that comes in giant balls in Big Box stores is not a great choice for a new knitter. Why? Well, it feels awful. You spend many hours with your first knitted project--it helps if you spend many hours feeling lovely wool or high quality cotton. Your finished product will last longer and look better if made from nice materials, as well. Poor quality acrylics are very uncomfortable in a scarf or a hat, for example.
  3. Novelty Yarn: you can't see what you are doing in novelty yarn, so you can't tell when you have made a mistake. Promise the student that a shiny or fluffy scarf can be their third project. Thankfully, that trend is passing, anyway.

Next: What to teach before casting on a stitch!

Remember, the above is just what works for me, and not "rules." These are guidelines, which means you can change them if you find something else works better for you!

Monday, September 10, 2007

More Productive Knitting Weekend!

In addition to going on about my weekend,

Close Up of Pantaloon Edge
Originally uploaded by sunasak

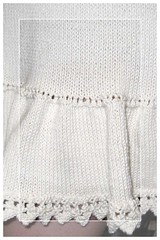
I'm also sharing the excitement of my friend Katie's Finished Object--beautiful lace-edge pantaloons, or lounging pants, or something. I have other photos in my Flickr set from my knitting friends, if you want to see what the whole thing looks like (I didn't want to put Katie in her lounging attire directly on the blog). As Katie points out in the comments, the pattern is Unmentionables, from Knitty.

Katie was incredibly patient knitting long stretches of stockinette, then VERY long stretches once the ruffle started. But she got to touch wonderful Cathay yarn for all that time, and now has the most luxurious lounging attire of anyone I know! Katie will no doubt tell me where the pattern came from in the comments, which will be helpful since my mind has blanked it out, even though I knew it perfectly well at one time.

Note: For some reason I keep spelling Katie's name like the Houston suburb of Katy, and not like her "real" name. I wonder how many times I will have to tell myself to stop doing that? Anyway, sorry, Katie.

My Knitting Fun

As the blog entry title hints, I had a better knitting weekend than last week. I did sock #2 for Lee's dad really quickly, thanks to a very long ride on a hot school bus and a lot of time at the yarn shop on Saturday. I'm just glad all that jumping up and down to cheer didn't get the stitches messed up. But, sock #2 is as sturdy, brown and utilitarian as sock #1!

I got well past the heel on the second Disco Colori sock by Sunday afternoon. I am very proud of the toe, which is a thing of beauty and smoothness, as well as the heel, which pretty much exactly matches the patterning on the first sock. I was not sure if the yarn would line up that well, but it did. Yay, I will have identical twins, not fraternal.

I wandered around the room thinking about what socks to knit next for a while yesterday afternoon. I eventually settled on the Silver Leaf colorway Panda yarn from Seacoast, because it is shiny from the bamboo, and so silvery and green. And not turquoise or brown. I went through a number of decisions on what socks to knit, but settled on the Walking Away Socks pattern from Fiber Trends. I've made the center pattern already (see this blog entry for info). This time I will make the one on the left, if you know what the pattern looks like. Everyone really seems to like my socks with interesting back views.

After that, I will go back to gift socks, because I found at the LYS on Saturday Austermann Step in a subdued orange and blue colorway that I can use to make "Go Gators" socks for my sister, who is in Gainesville. It'll be a two-sock holiday for her!

Non-Sock Knitting at Last!

But, I did it! I knitted something other than a sock! I unraveled the cast off on the lace panel I'd done on the surplice top, and started up the back in lovely stockinette. The yarn, which is Nashua Natural Focus Ecologie Cotton is lovely the way it shades slightly, but it sure likes to come apart. It's very loosely wound and consists of what appears to be ten or twelve very thin strands, and it is very easy to miss a strand. So I do have to pay attention. I will love wearing this, though, so I will march forward more rapidly now, I hope.

KnitPicks Needles

Wow, have those new KnitPicks needles started a lot of discussion on various boards and such. People either love them or loathe them. I guess those beautiful rainbows that seem so fun to me really bother others (yet I have read about people who find the metal ones "too shiny" so it takes all kinds, I guess). When I got to the yarn shop on Saturday, Amy was there to teach a sock class. Turns out she had done just what I did--opened her email, saw the needles and ordered ASAP so she'd get some before they sold out. We laughed at our own predictability.

Class

I taught a pretty big beginning knitting class, all but one of whom really weren't beginners, but that's OK. They were all progressing rapidly enough that they ended up making basketweave scarves, and once the realization that you have to move the yarn between knitting and purling was clear, they were going like gangbusters. Almost all of them were using Smile yarn on large needles, so a lot of knitting happened. What I liked best was that they were so enthusiastic that most of them are coming back next week to learn more! I had a request for how to knit a simple hat, so that should be fun to show them. As tired as I was from the long bus ride the night before, their enthusiasm was contagious! Teaching knitting is probably the most fun work I've ever done.

Saturday, September 8, 2007

Grab Your Credit Cards!

OMG! Even a headache and arthritic hands couldn't stop me from buying a lot o' merchandise before my first cup of coffee was finished this morning.

KNITPICKS HAS NEW WOODEN NEEDLES!

Run! Quick! You know they'll sell out!

THEY ARE ALL COLORFUL AND RAINBOW-Y!

And they are birch, with fairly sharp points. Oooh, that sounds nice. I think my knitting life may now be complete. I will have circulars in 0-3 including all the wonderful "in between" sizes we sock knitters love, plus 4-11 interchangeables in this beautiful new needles. Heck, who cares if I like to use them or not. They are PRETTY.

I think my morning email from Knitpicks was the most exciting thing that's happened in many a week.

Oh happy day! Since I have been missing out on things by dawdling (like Ravelry and the Cat B. sock book), I figured for ONCE I'd get my stuff in time. It's only been a few hours since the email came in, and many people sleep in on Saturdays...maybe I will actually get the needles!

In My Own Less Hyperventilation-Inspiring Knitting News

I did get down to the gusset on the second brown sock between the bus and lulls in the high school football game, which, by some miracle, our high school won. We were WAY the underdogs. Off to the yarn store to shriek about the new raibow needles and finish that one and get moving on the Disco #2.

Friday, September 7, 2007

Calm Your Enthusiasm


One Each of Gift Socks
Originally uploaded by sunasak
Yes, my period of not making the most visually exciting products continues, with a photo of one each of the two pairs of socks I am working on.

I must say that the brown acrylic worsted-weight socks came out more handsome than I'd imagined. And besides that, they appear as if they will be very warm and cozy on cold winter days. The soft Toddler Aran by Sirdar really IS soft, too! Making them on size 3 needles created a slightly more compact fabric than the navy socks had, so they will be better for Lee's dad. Lee actually likes the navy ones from last week just as they are, because he wants them to "breathe" (they're wool; they'll breathe).

At the last minute I decided to "gussie up" the Fortissima Socka Disco Colori socks for my sister and added a garter stitch crenelated top border to them. The top treatment is from Lucy Neatby's Cool Socks for Warm Feet, and I used it on another pair of socks I gave away a few years ago. It looks nice both folded down and standing up. The challenge now will be to see if I can get the heel on the second sock to come out like the first one. The symmetry looks very nice, even if it wasn't exactly planned! I'll be sure to break for the heel on a blue row and hope for the best! Gosh, wouldn't it have been SMART of me to write down how many center stitches I left? Hmm, I think there were 11 wrapped stitches. I'll just have to count!

I have a long bus ride followed by two days without too many planned things to do this weekend. Hoping to get the second socks mostly done during that time. I look forward to posting more "exciting" photos soon.

Wednesday, September 5, 2007

Two Socks in Progress


Two Socks in Progress
Originally uploaded by sunasak
Yes, I am caving in and letting you see my two socks in progress, aka SIPs. That's quite the exciting duo, isn't it? Not Suna's usual glaringly bright output.

But, elderly farmers with cold feet will appreciate a lovely brown top-down sock come fall (whenever that "falls" in Texas). That sock is now ready to have its toe done, since I got quite a bit more done after I took the photo last night and today as I listened to the Eggmen, a Beatles cover band, entertain at lunch (every once in a while paid employment has perks). If you're in Austin, check them out--they are one of the best Beatles cover bands in town (are there only two now?).

And below that is the one for my sister in Fortissima Disco Colori. You can sort of see the silver highlights gleaming in the flash. Odd colors, aren't they?

This is fairly tedious stuff, but I figure I will not feel guilty for switching to "me" projects if I get at least two holiday gifts out of the way (three if you count the navy ones I gave Lee). My hope is to be back at that surplice top I keep threatening to return to by the end of the weekend. Go me!

At least no other garment projects are tempting me. I actually want to work on the ones in my queue!

Tuesday, September 4, 2007

The Lost Weekend

Well, it feels like a lost knitting weekend to me. I planned to work on two simple socks, and my pentagon bag. I thought I'd get a lot done on a three-day weekend of easy knitting.

HA! I was so wrong! But, that brings me to why I started this blog. I didn't want to be one of those "look what a great knitter" I am people who churn out stellar designs right and left at a prodigious rate. I wanted to chronicle the ups and downs of a good knitter, but not necessarily a great knitter. I thought I'd enjoy reading later how I progressed on some things, and perhaps learn from my mistakes or challenges. And thought others might learn, too. So, this post will tell about some mistakes and what I did about them.

The Disco Cololori Sock

So, I have mentioned working on socks for my sister in Fortissima Disco Colori. Here is a link to the yarn and colorway if you want to look. I am making them at 68 stitches, because she has a wider foot than I do. I thought I ought to put in a gusset, since she also gets swollen ankles/feet, so they would go on easier. I made a ten stitch gusset, knitted a very deep short-row heel as a result, then decreased. And when I put it on...ooops, it was for perhaps a size 10, not a 7.5-8 US women's shoe. And it was big. So, I ripped out the whole heel. Sigh. Then I knitted a heel from the point where I started the gusset before. Oops. Now it was too short. Then I read, duh, that the foot should be around 6.5 inches before starting the heel, not 6. So I ripped again. Then I said, "Hmm, maybe I should try this other way of doing short rows..." which resulted in holes. So I ripped a third time. the fourth heel HAS to be fine, because the poor yarn is TIRED and getting a bit frazzled looking.

But, as you can imagine, this all took a lot of time. I feel like I actually only accomplished one heel in three days.

The Man Sock #2

At the same time, I also started the second pair of Man Socks, the one that really WILL go to Lee's dad. I am again using worsted weight yarn and the Thuja pattern from Knitty. I decided the gauge was a bit loose for my taste, so went down a size in needles to US 3. I thought maybe that would make them too tight, so I added a repeat, to 48 stitches around instead of 44. I knitted the ribbing and about two inches of sock. Then, hmm, they looked big. Lee tried them on. Argh. Big (and his dad is a skinny farmer fellow). So, I ripped them out and started again. Now they are fine. But again, it doesn't LOOK like I made much progress for a 3-day weekend!

All the wrapping of unraveled yarn caused me to actually look at the ball band, which I had not done when I found the yarn hiding in the 50% off rack at the back of the LYS. I had mostly noticed it was a manly medium brown and it was pretty soft. And it said it was "Aran" weight. I did NOT see the word "acrylic" on the label. I figured we didn't sell that stuff, ha ha. However, I only spend $2.80 on it when my discount kicked in. And it IS soft and a nice color. Here's a link to its information--Supersoft Toddler Aran by Sirdar. Says it is "100% Courtelle" on the website, whatever THAT is.

I decided it's fine--acrylic keeps you very warm, and Lee's dad's feet get very cold. So, another lesson learned: please read the yarn label even on sale yarn.

The third yarn I chose for his socks is a medium blue and made from wool. I'll post what exactly it is, later. There isn't as much of it as there is the Cascade or Toddler Aran, so I will do those toe-up in a simple 2x2 rib and stop when I get to the end of the yarn!

Pentagon

No photos yet, but I am progressing on it. There's just a lot of knitting around and around in the top of this bag (in lovely turquoise bamboo!) so I can only do so much at a time. I think just another inch or two and I will make the drawstring casing. Then I can show it to you.

Sunday, September 2, 2007

Man Socks on Man Toy


Man Socks on Man Toy
Originally uploaded by sunasak
These are definitely not the most exciting knitted items I ever produced, but they will do the job. I tried to make them more exciting by posing them on Lee's motorcycle. Scary and manly they are now!

These socks are Thuja, from Knitty.com, which are worsted weight "house socks" for a man. Originally they were to be for Lee's dad, but I made them slightly too long, and Lee loved them, so now they will be for Lee when it gets cold in the winter. I made them in the classic Cascade 220 superwash, so they could go in the washer and dryer. They are navy bluem and have a garter rib pattern for a little interest. They knit up really, really quickly, so they would make a great holiday gift!

I got the yarn to make a brown pair and a ligher blue pair for Lee's dad. I may knit those on a size smaller needle, since these seem loose to me (even knitting on size 4s, when the pattern calls for 6s).

I am knitting a pair of gift socks for my sister in Fortissima Colori Socka Coliri Disco (or something like that) in an odd combo of tan, blue and gray, with silver highlights. I'm doing them in standard toe up with no patterning or anything, and have just about finished the heel. I'll take my time on these and work on other things along with them.